Using voice to control a website with Amazon Alexa, part 1/6
Introduction, prerequisites, and building the Alexa skill
Update 01.01.2020
This tutorial was written in 2017, and it is now outdated. Thank you for all the kind feedback and suggestions. If you finished the tutorial, congratulations! :)

In this tutorial I will show you how to control a simple website using Amazon Echo (Alexa). This is the Alexa version of a similar tutorial I’ve written for the Google Home. If you’re interested in setting up the same solution for Google Home, you can find that tutorial here.
After completing this tutorial, you will be able to tell Alexa what you want to see in the browser, and the website will be updated accordingly. Since this is a proof of concept, we will build a very simple website showing pictures of dogs. Once you have built a simple solution like this, you can easily extend the functionality to more complex webapps.
Here’s a quick demo of what we will accomplish:
There are multiple use cases for controlling a website using your voice. You may want to see videos and instructions for a recipe while your hands are busy cooking. A doctor may want to see a patient’s medical images and lab results while examining the patient. A gallery of images and videos is therefore a good use case for voice navigation. In this example we will navigate a small gallery of dog pictures.
Disclaimer: The techniques used in this demo are not suitable for a live production environment. This is meant as a prototype and proof-of-concept. It works, but to go live would require additional work to make your solution secure and scalable. Throughout this series I will try to highlight the specific elements that you may need to improve in a live production solution.
Make it work, then make it better.
This is what we will cover in this series:
Chapter 1: Introduction, prerequisites, and building the Alexa skill
Chapter 2: Setting up the back-end lambda function
Chapter 3: Finishing the back-end lambda function, and creating the database
Chapter 4: Creating a lambda function that reads from the database
Chapter 5: Setting up the API that will be accessed from a web client
Chapter 6: Programming the web page that will show the dog pictures
How it all works
The end goal is to talk to Alexa and have your website update to show what you tell Alexa you want to see. There are a lot of moving pieces to accomplish this:

- Build the Alexa Interaction Model (the front-end) on developer.amazon.com.
- Build the back-end functionality using a Node.js lambda function on aws.amazon.com. Point the front-end to the back-end.
- Set up a database that will store information about which dog picture the user asked for.
- Connect the back-end lambda function to the database so that the command you speak to Alexa is stored in the database.
- Create a lambda function that reads from the database.
- Set up an API that will access the lambda function and return the value the function retrieved from the database.
- Create a simple website that shows dog pictures using html/css and javascript. This website will access the API to determine which dog picture to show. Every time the user asks for a new picture, the website will be updated.
I will go into details for each step of the solution, showing you how to set it up so it all works together.
Of course, this isn’t the only way to accomplish this. One goal of this tutorial is for newcomers to become familiar with some of the amazing tools available through Amazon AWS, and this is one way you can utilize the AWS ecosystem to build this prototype.
All of the code and files needed for this project is available on GitHub.
Before you Begin
You will need an Amazon Echo, an account with developer.amazon.com and an account with aws.amazon.com. For Amazon AWS you will need a credit card. If you do not have an Echo, you can use the website echosim.io, although I have not fully tested this prototype using that service.
Go to developer.amazon.com and aws.amazon.com and sign up with the same email address that you’ve registered your Amazon Echo with.
When signing up for AWS, choose the free Basic plan. Building, deploying and testing your solution is all covered by the free plan.

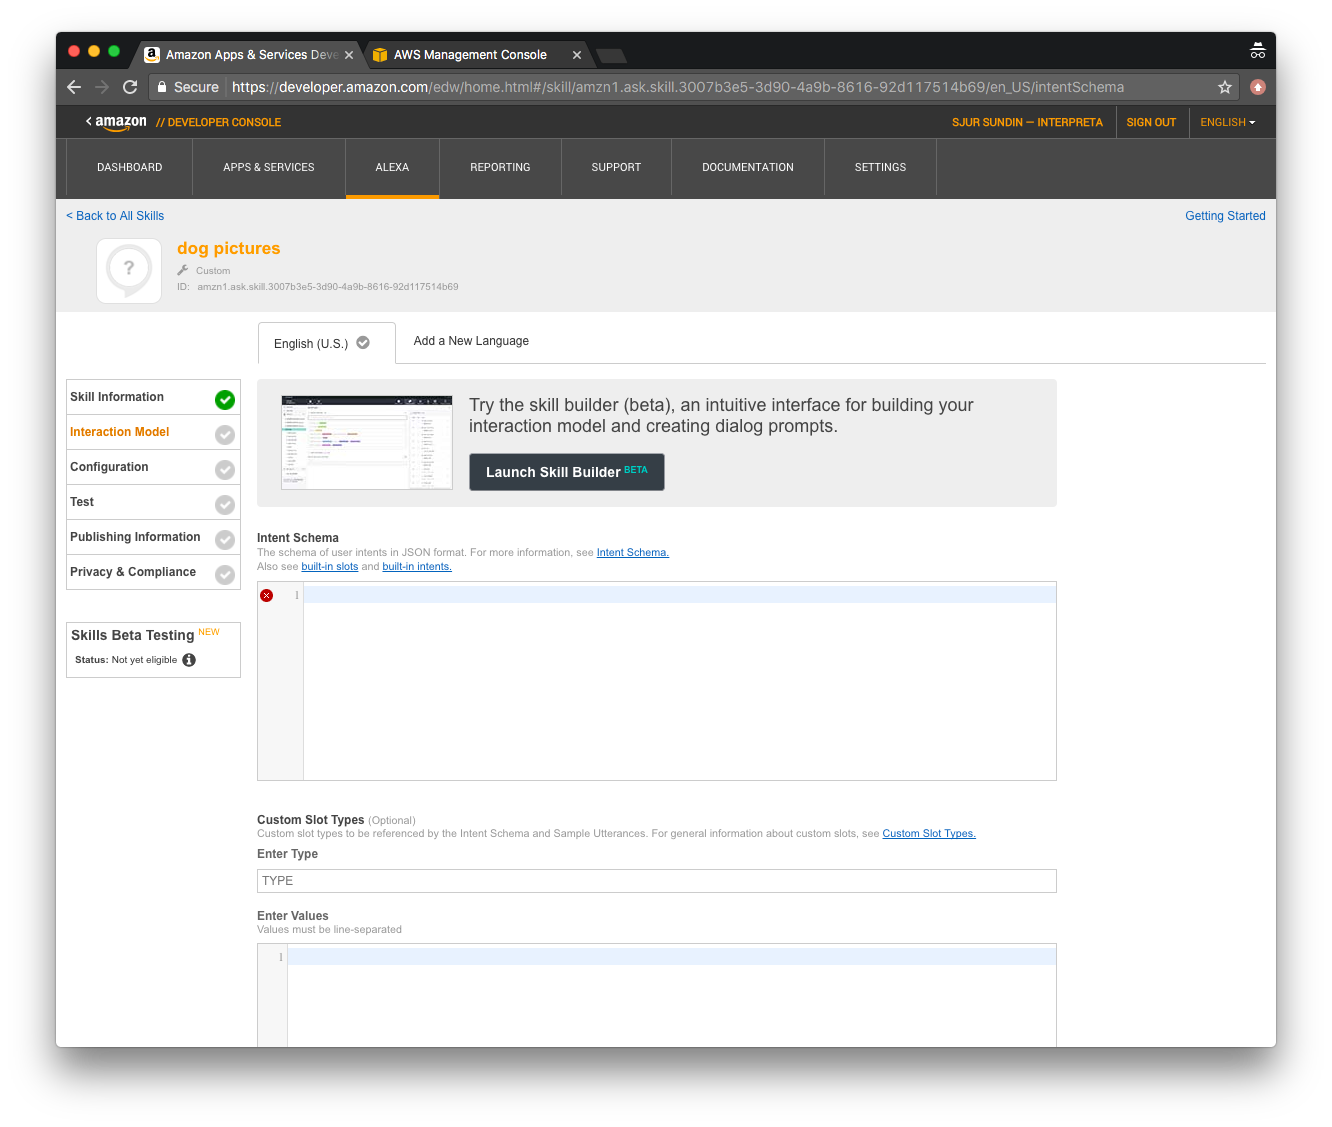
Building the Alexa Interaction Model
In this section you will build the interaction model between you and Alexa. You will define your intents, such as show dog picture number 3, or show all dog pictures. You will also define the sentences (utterances) you can speak to Alexa to fulfill your intents.
Start by going to developer.amazon.com, sign-in, and click the Alexa tab, you should see this page:
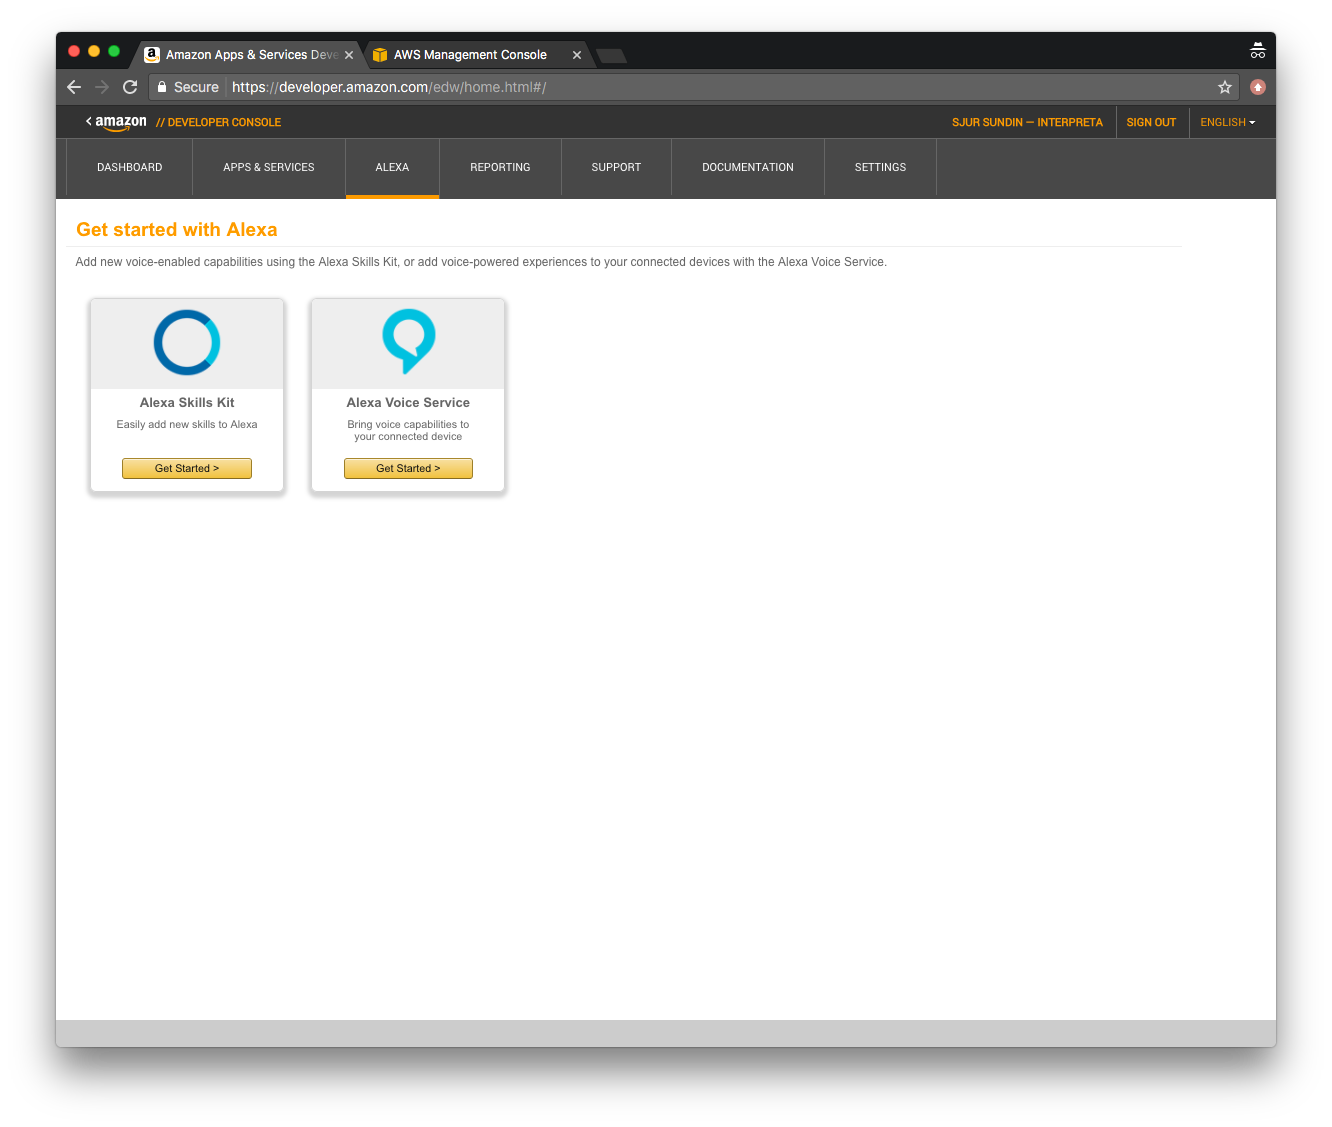
On the Alexa Skills Kit tile, click the Get Started button, it should take you here:

Click the Add a New Skill button to start setting up your Alexa skill:
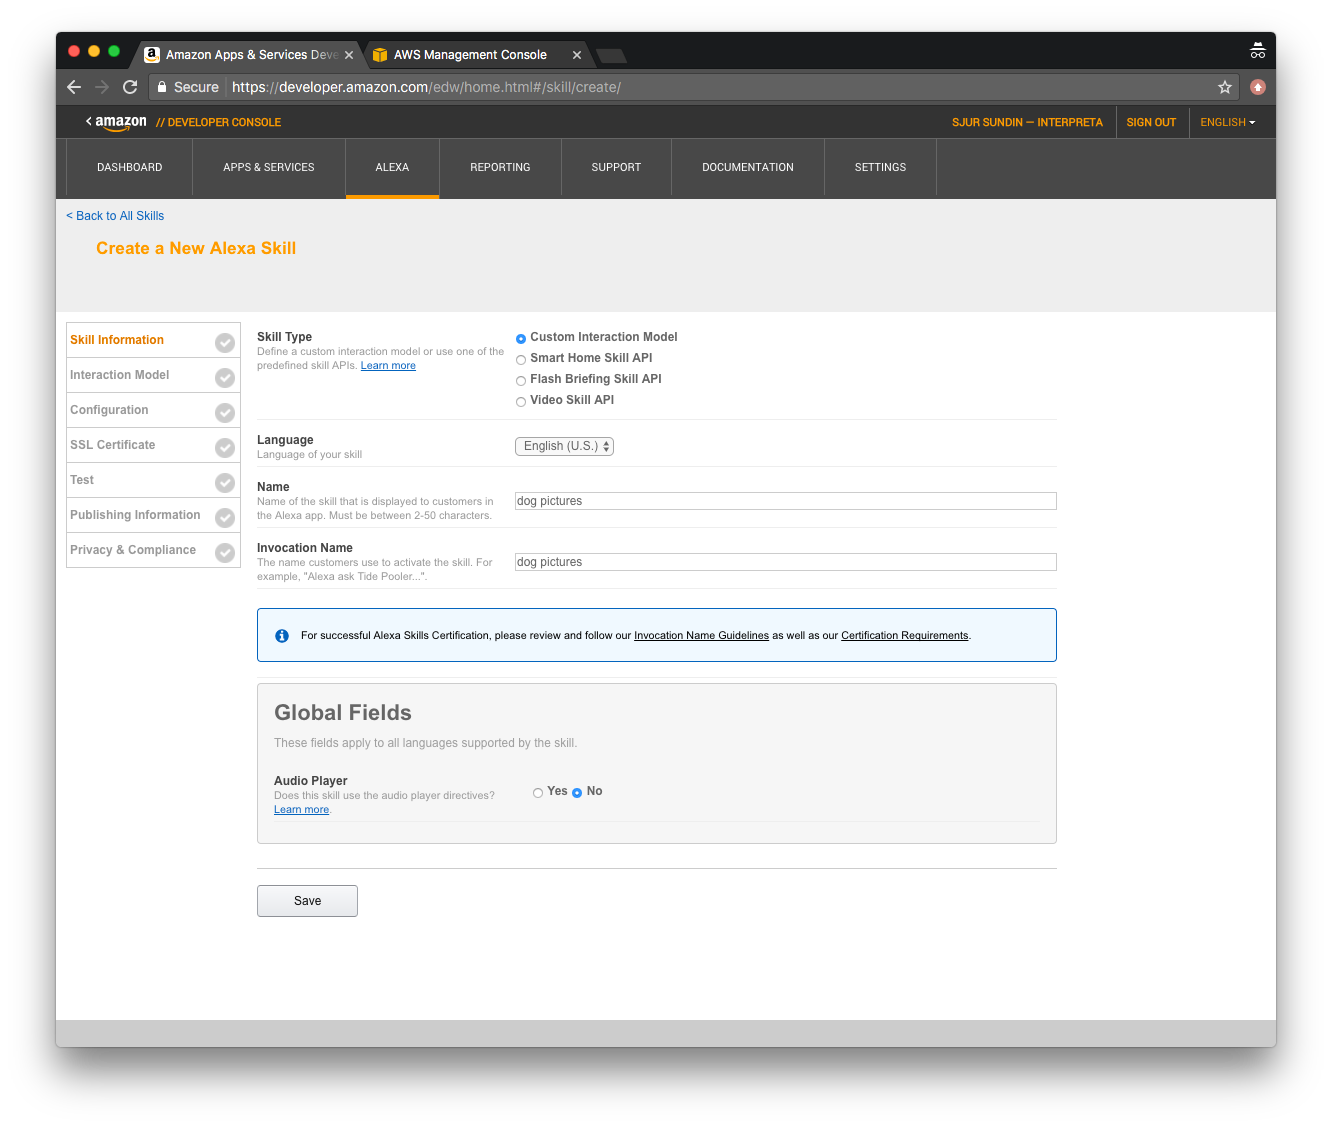
As you can see, I’ve already filled in the Name and the Invocation Name of the skill. The Invocation Name is what you use to start the skill when talking to Alexa. For instance: “Alexa, open dog pictures”.
You can of course use other values, but these values will be used throughout the tutorial. Your skill won’t be made available to the public, this is only for testing on your device, so don’t overthink the names at this stage, you can always change them later.
Fill in the name and the invocation name, leave the other settings as shown, and click the gray Save button to get to the next screen:
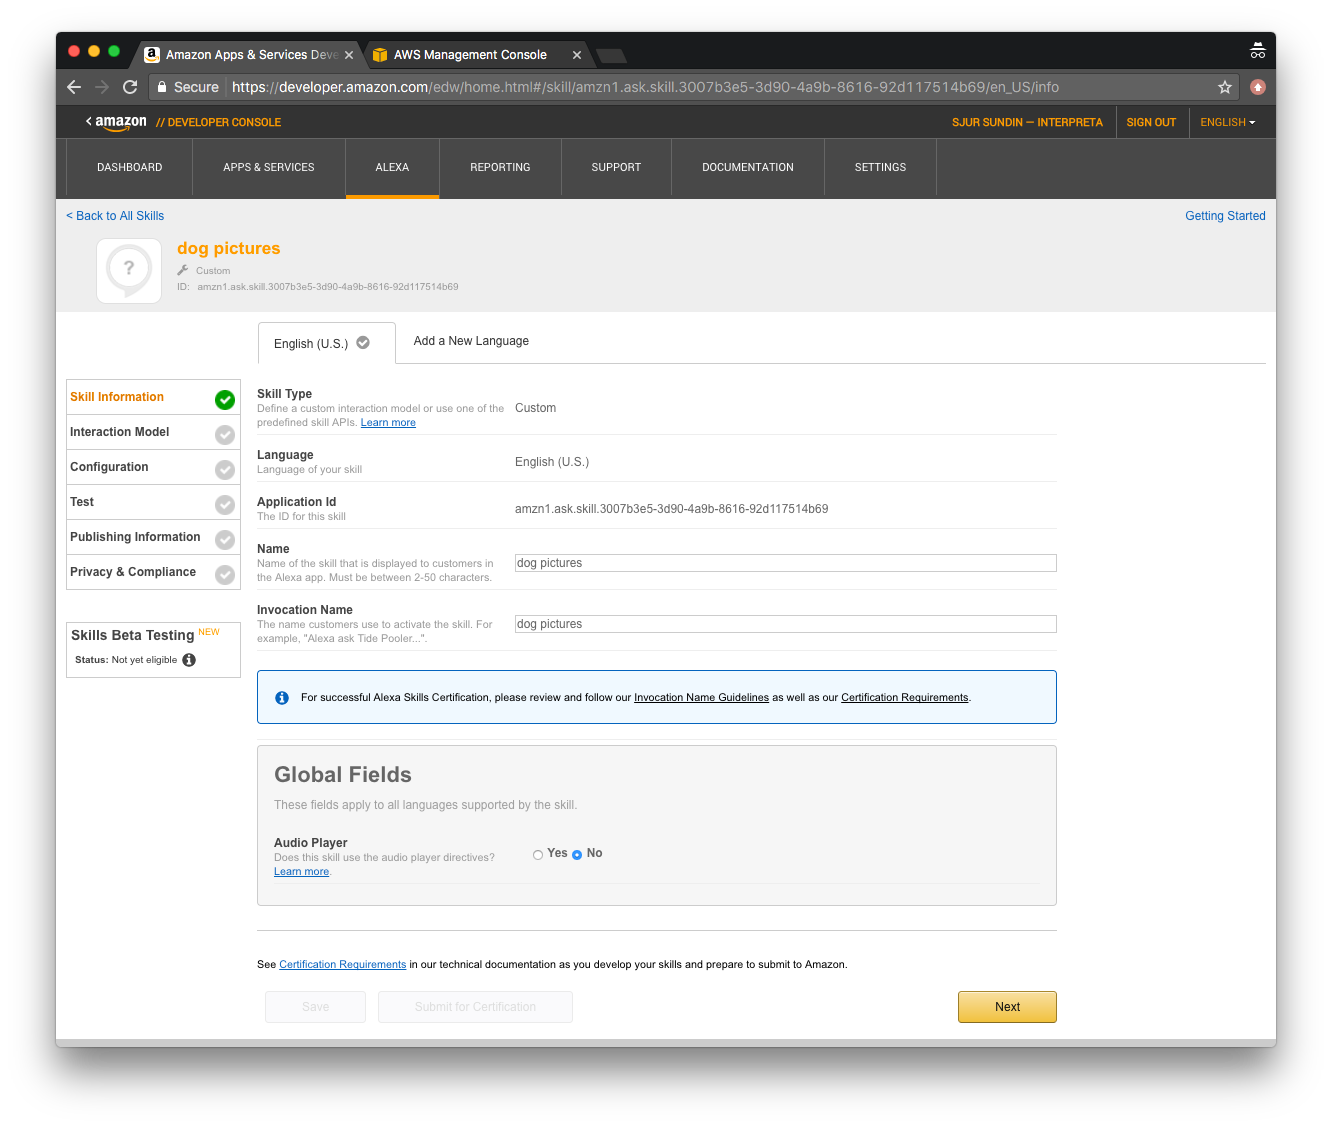
You should now have a green checkmark next to the Skill Information, which means you’ve successfully completed the first small step. Hit the yellow Next button at the bottom of the page to go to the Interaction Model:
We will build the Interaction Model using the Skill Builder, which is currently as of August 2017 in beta. Click the Launch Skill Builder button to launch the skill builder. You may get an error message telling you that there are unsaved changes. If you get this message you can safely hit Discard, this will take you to the Skill Builder. Don’t worry, you did not lose any data.

You should now arrive at the interface for the Skill Builder, where you will define your Intents (what you want to do), and your Utterances (the sentences you will say to make it happen).
There’s a lot happening on this screen, but we will focus on the Intents and the Slot Types to build our interface.

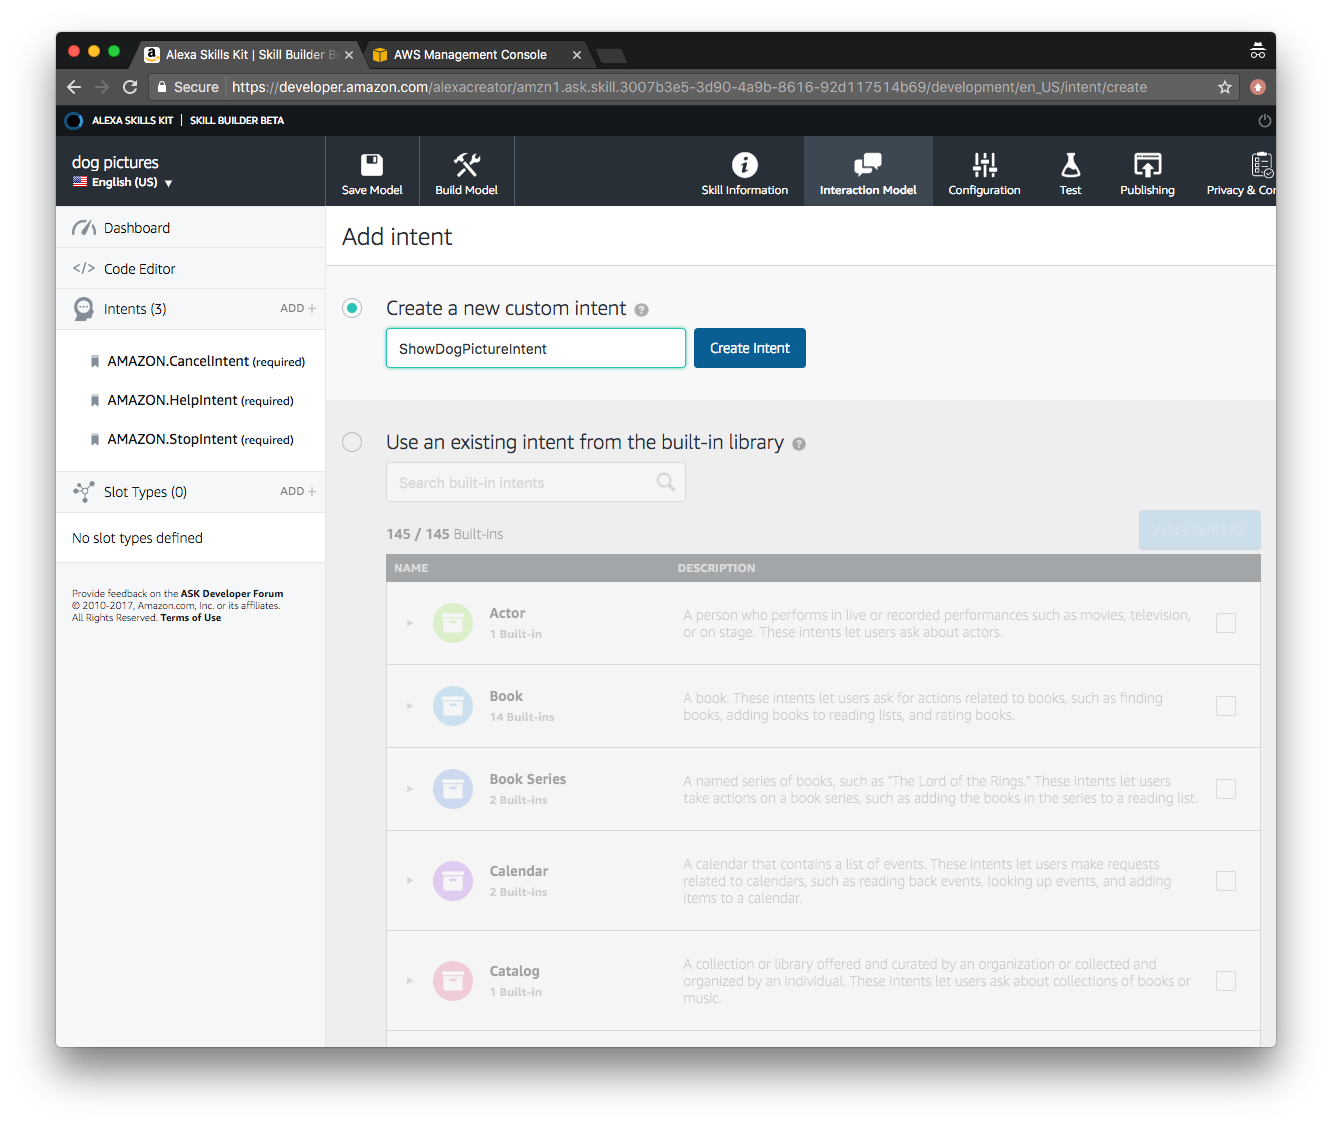
We will need two intents two build our skill. One intent for showing a specific dog picture, as in: “Show me picture 3”, and one for showing all dog pictures, such as: “Show me all pictures”. As we can see, these are two different sentences, where one of them has a number. We need to make sure that we account for all possible numbers the user can say, and that Alexa understands which number was said. The intent for the specific dog picture is therefore the most complex one, and we will start with that one.
In the Intents section in the left navigation menu, click the Add+ to add a custom intent. The Add Intent screen appears, and is asking us to name the intent. The purpose, or intention if you will, of this intent is to show a specific dog picture, it therefore makes sense to name it ShowDogPictureIntent. The naming of your intent is important, as you will define the back-end for this intent using its name later. Name the intent, and hit the Create Intent button.
You will now define the Utterances that will invoke this Intent. Typically a user might say: “dog number 4”, or “show me image number 3”. In order to make that work, we have to use a slot type to handle numbers. The Alexa skills kit comes with a lot of built in slot types that help us when there are several different distinct values a user might say, such as cities, states, numbers. Think of the slot as a variable that can have as a possible value any one of all available numbers. For instance, a slot type for US states would be a variable with 50 possible values.
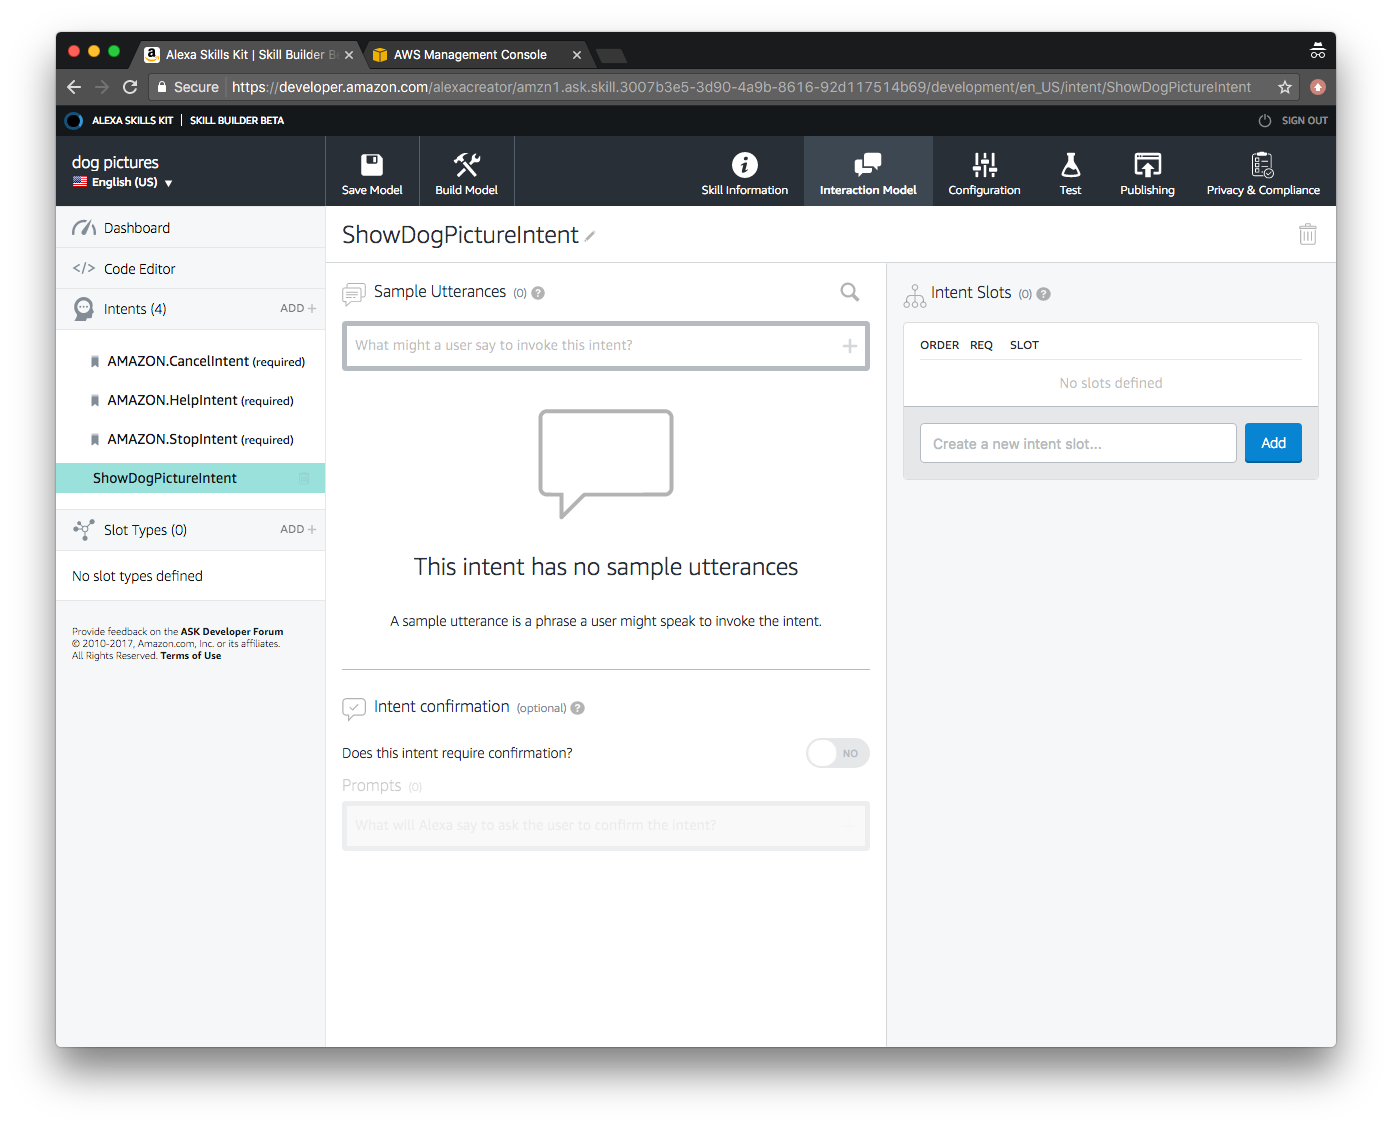
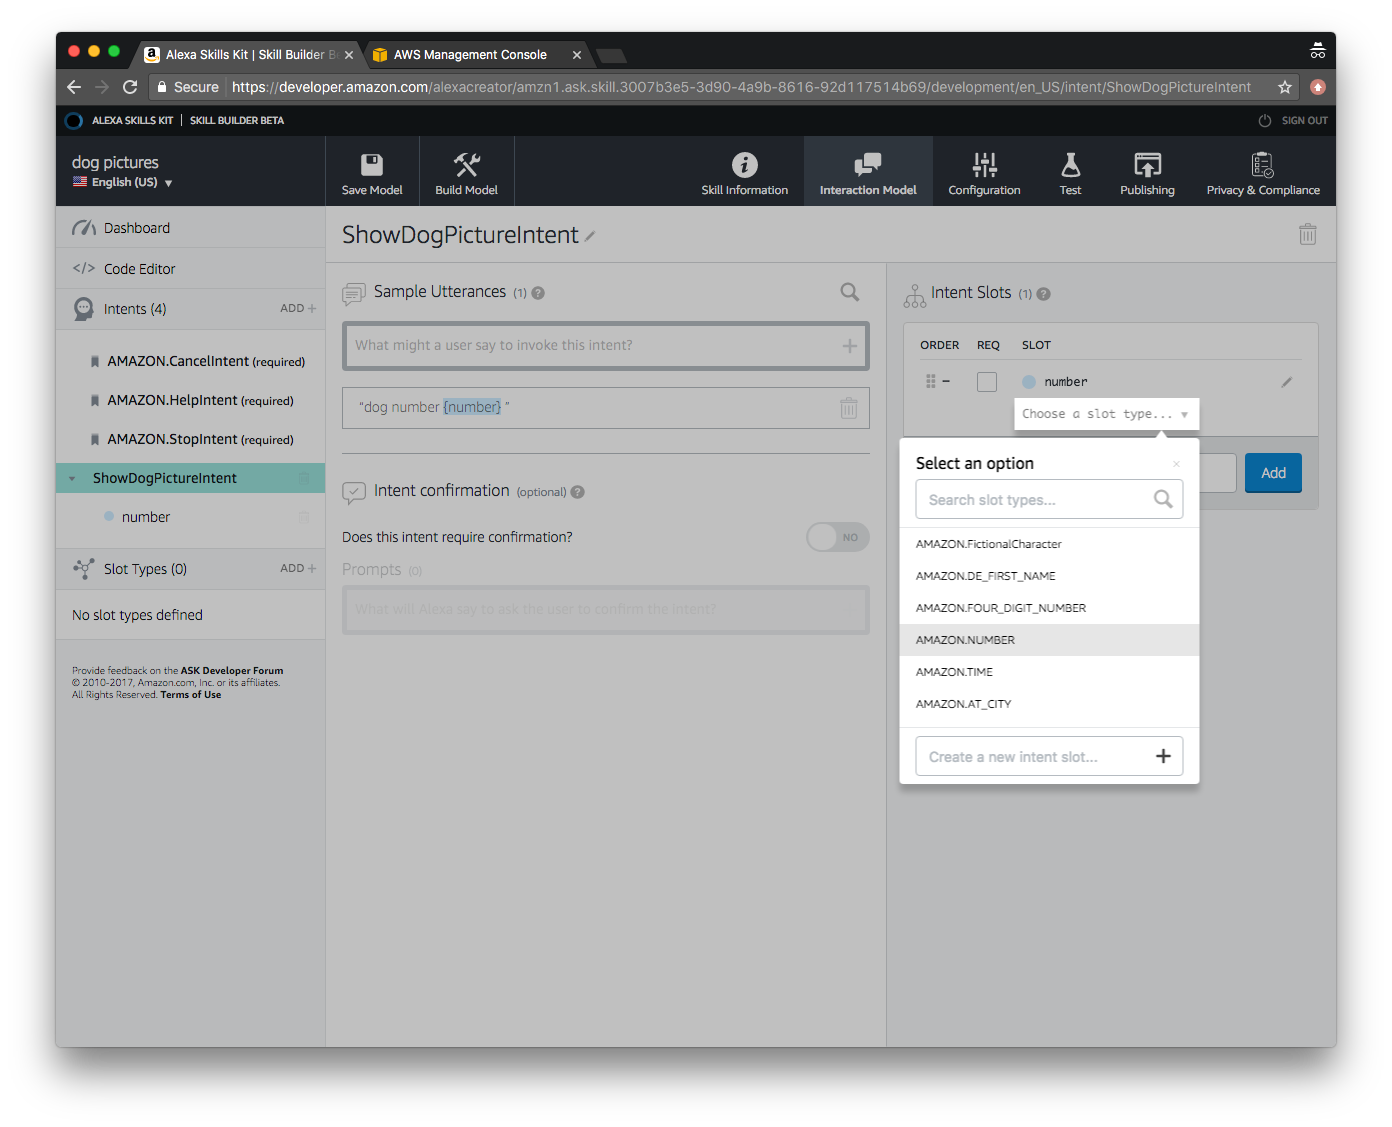
Start typing the example sentences, and notice when we get to number, we need to define which slot type to use
Type dog number { and skill builder automatically asks for an intent slot.
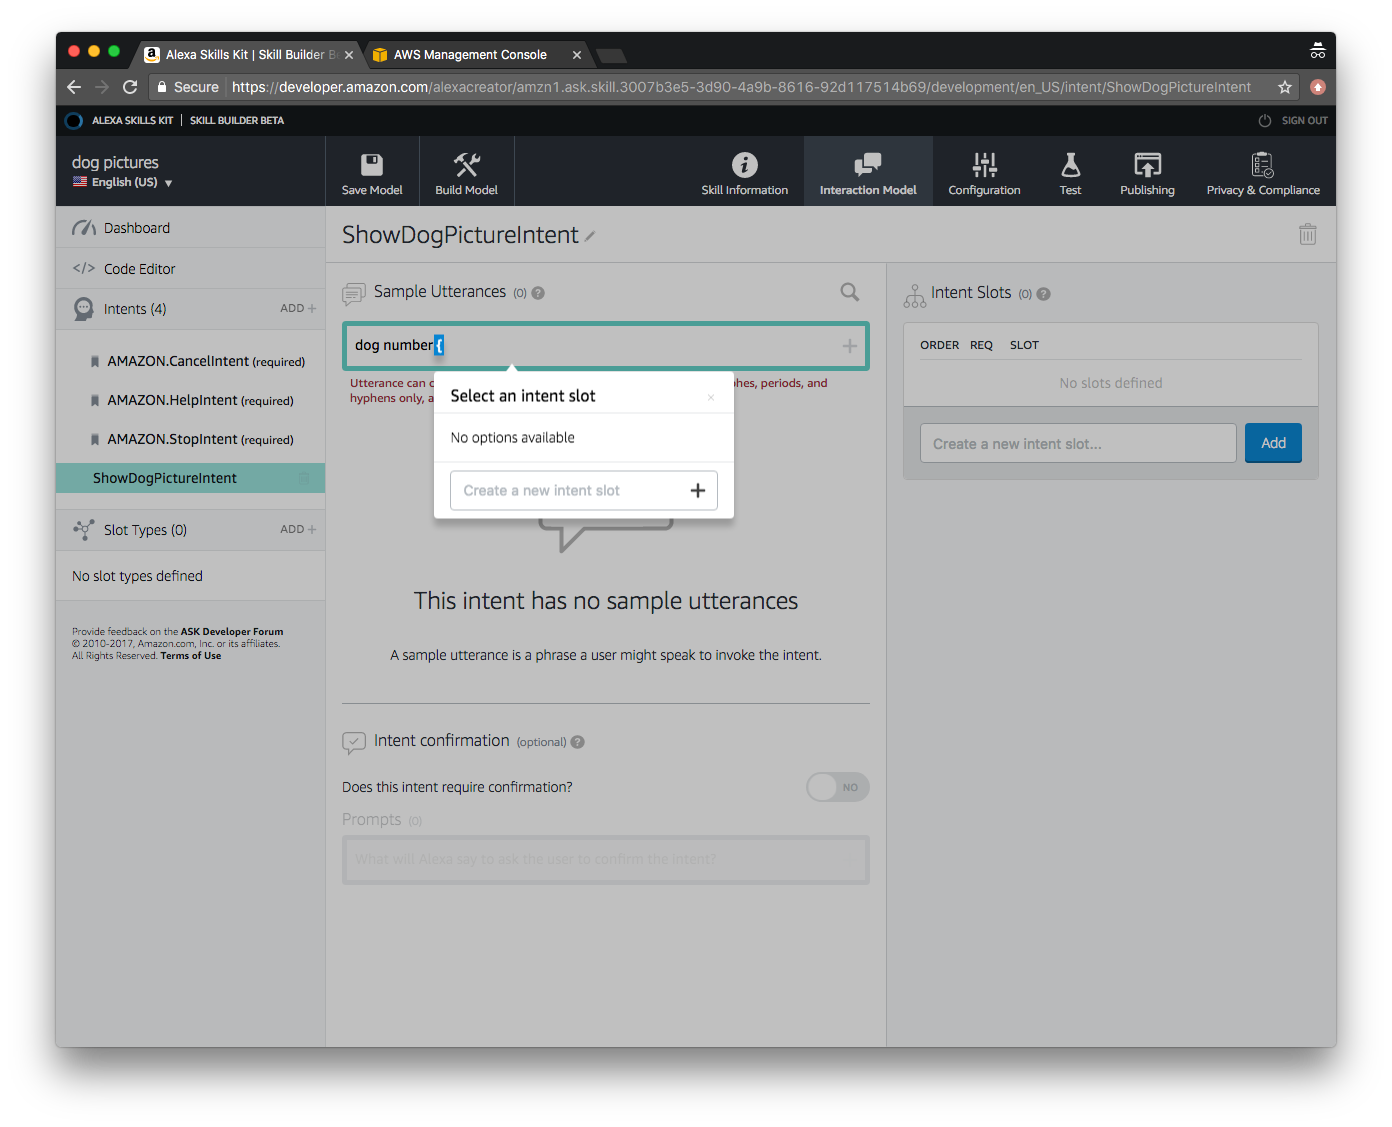
Click the box that says “Create a new intent slot”, and type number and hit the + button to add the intent slot to the Utterance.

Finish the Utterance by completing it like this: dog number {number}, and hit the + button to the right of it to add it to the Intent.
We now have an Intent, ShowDogPictureIntent, with an Utterance to invoke it, “dog number {number}”. But we have not defined what {number} is. Interface builder only knows that we intend to use a slot called {number}, but we have to define what {number} is. {number} is a variable, but we need to tell interface builder what kind of variable it is.

To do that, we have to go to the Intent Slots section, you can find it on the right side of the screen. Click the dropdown menu for Choose a slot type… and select AMAZON.NUMBER. This is a built-in slot type that lets you handle numbers in your skill. We only have to do this definition once. If we later add another sentence that uses {number} interface builder knows what we’ve defined it as type AMAZON.NUMBER.

One utterance is enough to fulfill the intent, but it is good practice to try to cover what a user might say to invoke the intent. We will therefore add a couple of more utterances which, if uttered, will invoke the intent. After adding three more, we now have four slightly different utterances who all use the {number} slot, and who all will invoke the intent.
In other words, saying “dog 4” or “show me dog 4”, are both sentences that will eventually successfully display dog number 4 in your website that you will build later.

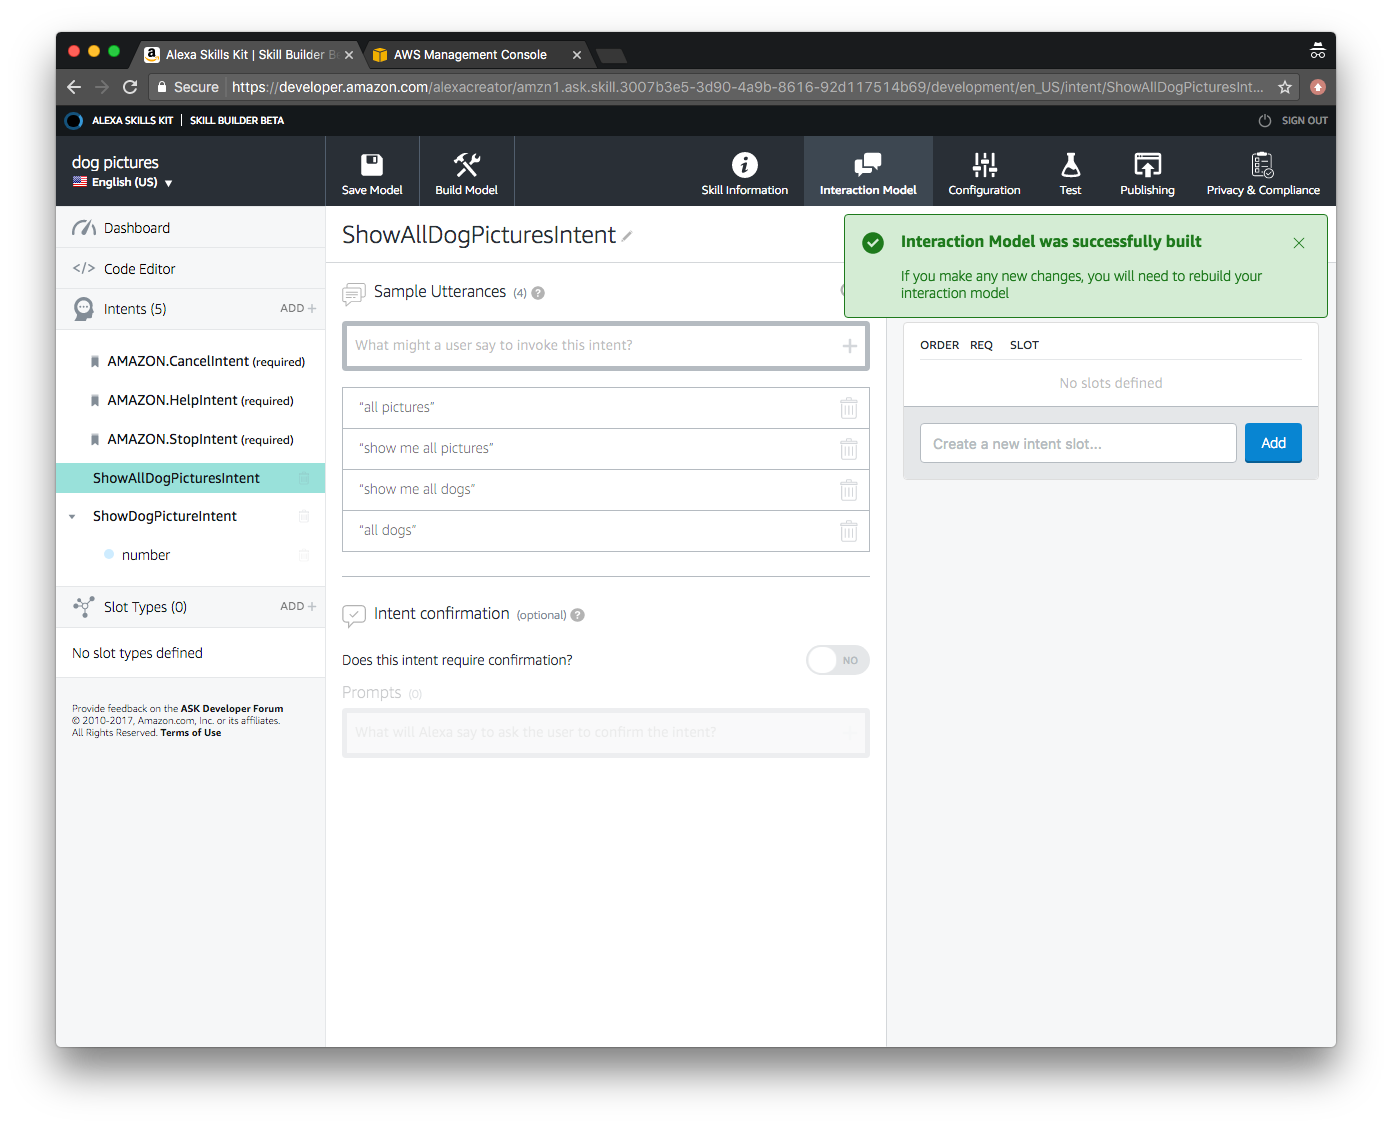
We also need an intent to show all dog pictures, they will be displayed in a grid on the screen in your website. This intent is easier, as you don’t need to provide any slot types. Simply saying “show me all dogs” should be sufficient to invoke that intent. Finish your intents by adding the ShowAllDogPicturesIntent:

Two utterances, “show me all dogs” and “all dogs”, should be sufficient for our purpose, add these to your intent:

For the sake of usability we will also add “all pictures” and “show me all pictures”.
It is now time to save and build your model, do this by first hitting the Save Model button at the top. Once the model has been saved, hit Build Model. It is important to build your model every time you make changes to it. If you make changes without rebuilding, Alexa won’t recognize your changes.

Wait while the model is building…

Your model built successfully, and you can now move on to the configuration tab.
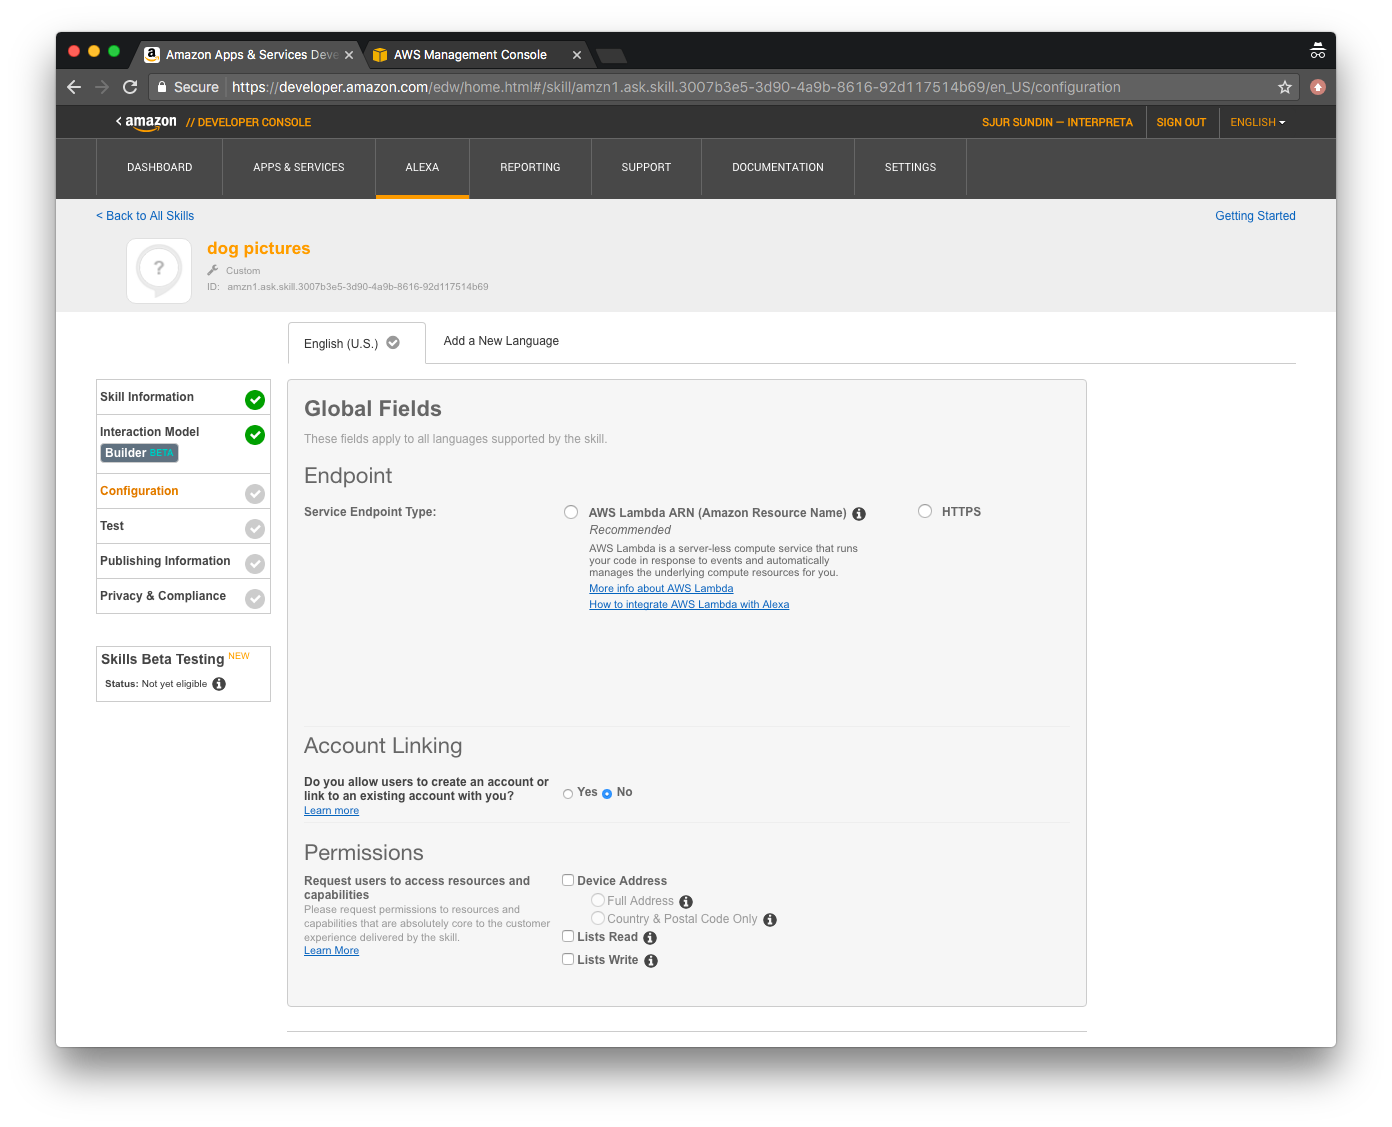
Click Configuration in the top menu.
You’re now on the configuration tab, and as you can see you have two green checkmarks, one for Skill Information, and one for Interaction Model.
In order to proceed with configuration, we need to set up the back-end function for our skill. We have configured two intents, but we have not coded any back-end functions to handle those intents. If you look at the screen below, you see something called Endpoint. The endpoint is the back-end lambda function that will handle your intents. After we configure the back-end, we will return to this screen to specify the endpoint for our Alexa interface.
Progress so far
If we revisit our flow diagram, we are now 90% finished with section 1, the Alexa front-end, and we’re about to begin section 2, the lambda function for the Alexa back-end. Once the lambda function is set up, we can point to it using the Endpoint screen above, where it says AWS Lambda ARN (Amazon Resource Name).
That’s it for chapter 1! Setting up the back-end lambda function and connecting the front-end to the back-end is covered in chapter 2.
If you have questions or comments to this chapter, please leave a comment, or contact me on LinkedIn. ☺