How to use real data in Framer X
Framer always was different from other prototyping tools for many reasons but the major one is real data. I’ll try to show briefly how you can load and use real data in your prototypes.
Today we will make cards based on real data. The most common and efficient way to load data today is JSON format.
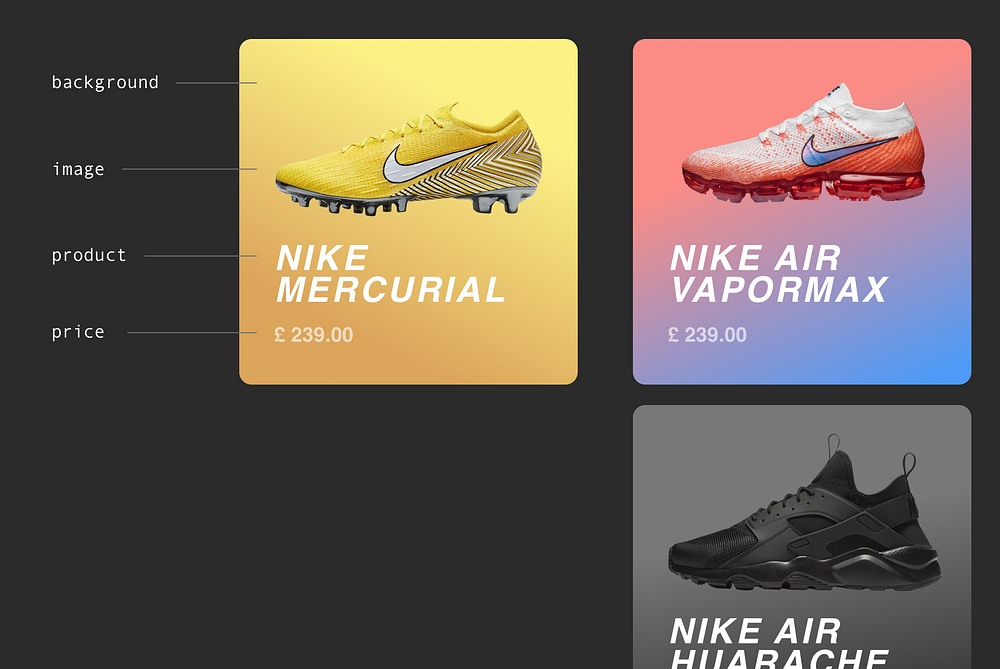
So, we will make some product cards. Let’s take Nike sneakers and three cards for example.
To create cards we need four keys:
- image — a sneakers image on transparent background
- product — name of the product
- price — obviously is a price
- background — is a card background, we will use a linear gradient.
To make this article shorter let’s skip the part where I explain how to make A layout in CSS (how the CSS layout is made, so here’s the code):

We start from removing all default parts in our component, even Framer ControlTypes, because we won’t use them. We have only:
- default component size in
defaultPropsobject, - render() method with layout containing a “wrapper” div,
- a card — just one for now
- and styles for each card element.
Plus we will use map() method to create a loop.
Use a JS object inside a component
It’s simple: just add an object in the beginning as a const variable

Then add a loop Object.map() to the render method:

With the spread operator we can mix many style chunks into one object. It’s very convenient —we mix backgroundImage and styles outside the class.
👇👇👇 DOWNLOAD THIS FILE 👇👇👇
Load data from JSON using external API
Let’s take RandomUser.me API. Some code from this method we will use in next examples.
To get data from the website we will use the fetch() method, it’s the modern way to make http requests
but first things first, break down the component
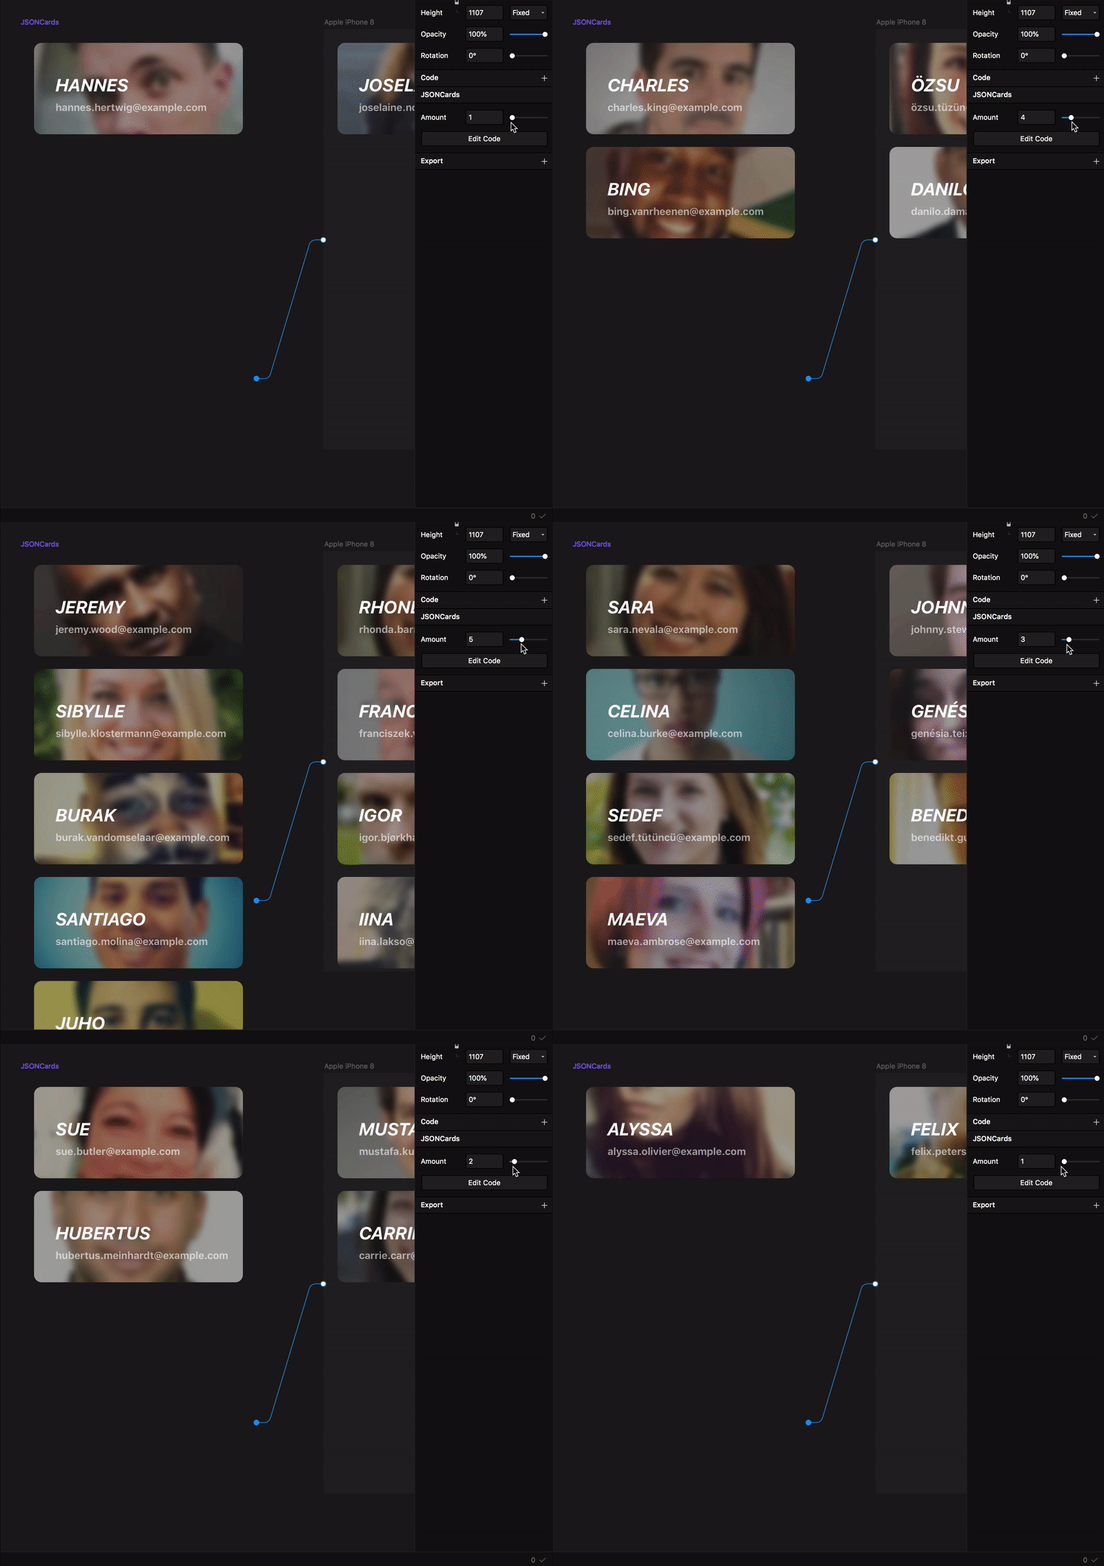
line 5—11. props.userAmount —this is a cards counter (number controller) and with its help we could set the number of product cards we need to create.
state.json—React don’t have setProps(), so we will use setState() instead. We have to use setState only in React Lifecycle. Let’s call our state “json”.
interface Props {
    usersAmount: number;
}interface States {
    json: any;
}
line 13. It’s our link, a place where a GET request will be sent. To define how many profiles we want to get, we will use query string ?results=number but the number we will set in the props object.
const dataURL = "https://randomuser.me/api/?results=";line 17—25. Define default props, number of cards in particular. Also, we should create “json” state it should be an empty array.
static defaultProps = {
    width: 375,
    height: 600,
    usersAmount: 3
};state = {
    json: []
};
line 27—35. Create a Framer control. Max cards amount will be fifteen for example.
static propertyControls: PropertyControls<Props> = {
    usersAmount: {
        type: ControlType.Number,
        max: 15,
        min: 1,
        step: 1,
        title: "Amount"
    }
};
line 37—42. The most important part in our code is the fetch() function. We will call this method in a few places in the component lifecycle.
In the function we will pass dataURL + this.props.usersAmount
fetchJSON(jsonPath) {
    fetch(jsonPath)
        .then(response => response.json())
        .then(data => this.setState({ json: data.results }));
}
line 46—56. As I mentioned we will use fetchJSON() in the component lifecycle methods — componentDidMount() and componentDidUpdate().
// We need this method for the very first time
// when we drag`n`drop our component from the left panel
componentDidMount() {
    this.fetchJSON(dataURL + this.props.usersAmount);
}// Compare previous and current Prop. If they are different
// we could make changes
componentDidUpdate(prevProps, prevState) {
    if (prevProps.usersAmount !== this.props.usersAmount) {
        this.fetchJSON(dataURL + this.props.usersAmount);
    }
}
line 58–80. Render() method is the same as in the first example. Create a loop Object.map(), take keys name, email and picture from the fetched object.
Boom! Done!

👇👇👇 DOWNLOAD THIS FILE 👇👇👇
Load data from a file
This prototype will be like others, but we will use new Framer X property control — file. With this control we could load and use any file from our system.
Because we don’t have a JSON file in the initial state we need to create an empty placeholder state. To change this state (fill it) when component will be mounted or updated (through props.json) we need to check the length of the returned fetch object. If this object has a length less then 0 we will use our placeholder. Like in componentDidMount() if props.json is empty we will show warning message in console.
componentDidMount() {
    if (this.props.json && this.props.json.length > 0) {
        this.fetchJSON(this.props.json);
    } else {
        console.log("%cPlease include JSON file", "background:#f45; color:#fff");
    }
}
The same check method in render(): If we have a JSON file → do this, if not → do that.
<div style={this.props.json && this.props.json.length > 0 ? wrapStyle : errorWrapStyle}>And the file Framer control for loading external files.
static propertyControls: PropertyControls = {
    json: {
        type: ControlType.File,
        allowedFileTypes: ["json"],
        title: "JSON"
     }
};Load data, design-components and overrides
And the last part is how we could mix design-components and real data. To make it possible we will use props.children. With props.children we can pass design component or code components into another code components.

In my opinion is not a good approach — to use design components when you have a deal with text layers because Framer X don’t have relative positioning (Framer guys please write this feature into your backlog) it means that we couldn’t make a “true flexible” component.
There is some advantages over code components —it’s the speed. We can make design component much faster then code components, test multiple modifications.
What we will do?
We will do a wrap component, this component can create a number of cards based on json object length (loaded from the file)+ we will have overrides inside the component which we will use in cards (design-component). I think this is very convenient — to use overrides instead of code script which will go through children and find matches like— text, image, background; furthermore I didn’t find how to change a text inside a text layer using props.children. Overrides looks better then this.props.children[0].props.chilfren[0].props.children[2].background
This is our scheme:

In this component we won’t to load a JSON by fetch() method, we will use a JSON file as a local file. To do this we need to rename cards-data.json into cards-data.ts and create an exportable const inside. After that move this file into the “code” folder.


And the component code. What I like here is that component is really simple
Our code consist of three parts — dependencies (or imports), class and overrides.
line 1–10. Pretty usual part but line 3 is data obj import
import { cardsData } from "./data/cards-data";inside interface Props we create itemsAmount prop with this property we will control a number of cards inside the component.
Second part. It’s a part where we create our class, let’s name it DesignCompAndJSON.
line 14–18.

line 21–29. Here we create itemsAmount controller where max value is the same as data obj length. Also, we mix all Stack controls to the component controls.

line 31–37. In render() method we create an array from itemsAmount prop and iterate linked children through the map() method.

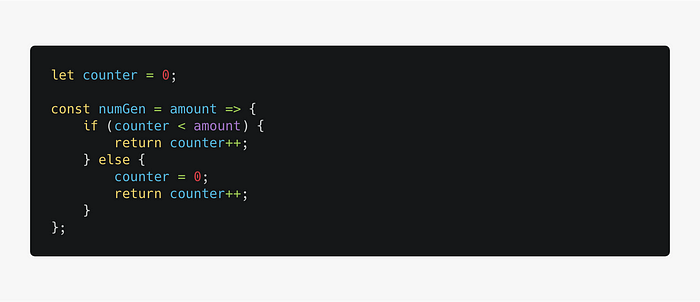
line 40–49. Third part starts here. Here we create a counter; we wouldn’t make a random function, instead, we will create a counter function and each time we use overrides, we will increment the counter variable, if the variable is bigger than our data obj, then we will reset it to avoid errors.

line 57–71. The last part is Overrides. We made overrides for each layer in our design component — image, product name, price and background gradient.

This overrides will be available for all design components from the sidebar “code” section .

This is it. Now we can override all elements in our card and choose which overrides we want to use

Link different designs.

Thank you! I hope this is useful
Yours sincerely,
Pavel a.k.a. “I maked these” Laptev


