Sketches, Wireframes, Prototypes. Levels of fidelity and what to expect from each
#30dayUXchallenge [Day 15]
We are halfway through our #30dayUXchallenge and it’s time to start solidifying the ideas we captured in the previous steps, so let’s talk about how to do it through prototypes!
Prototyping is all about giving concrete form to abstract ideas.
It’s a way to validate or invalidate our assumptions. It simulates the experience we want to deliver without requiring us to build the real thing.
We shouldn’t worry about making it perfect. It doesn’t need to look good as long as it communicates the idea and is appropriate for the feedback we are aiming to get. We will talk about how to plan our user tests properly on day 19, but it’s important to understand which prototype methods will help us achieving each goal beforehand!
The only prototyping rule is: do it early and do it often.
Prototypes help us to:
- Work through a design: to shape our own ideas, even if it is only for the sake of solidifying our own ideas. A quick session of paper prototyping can help brainstorm solutions if you’re currently stuck with your digital prototype.
- Communicate Concepts: By visualizing the concept, the team is able to build a different level of understanding about that concept. Prototypes make it a lot easier to analyze, estimate efforts and feasibility.
- Sell our idea: Prototypes can be amazing to help our stakeholders/clients visualizing our ideas. Whenever I talk about a “white dog”, it’s up to you to follow my description and picture your own “white dog”. When I show you one, it’s much easier to get buy-in on my concept. We are all talking about the same “white dog”
- Estimate feasibility: By knowing exactly what the prototype intent is, teams can easily and accurately estimate its feasibility and effort. It’s black and white.
- Test usability earlier: Testing our prototypes empower us to learn quickly while we still have high flexibility to adapt and fix the points that still need improvement.
According to the book Prototyping: A Practitioner’s Guide, prototypes helped increase accuracy by 50% while reducing requests for clarification by 80%. The same case study cited above saw 25% reduction in post-release bugs thanks to prototyping.
So what type of feedback are you willing to get?
Low-fidelity Prototypes
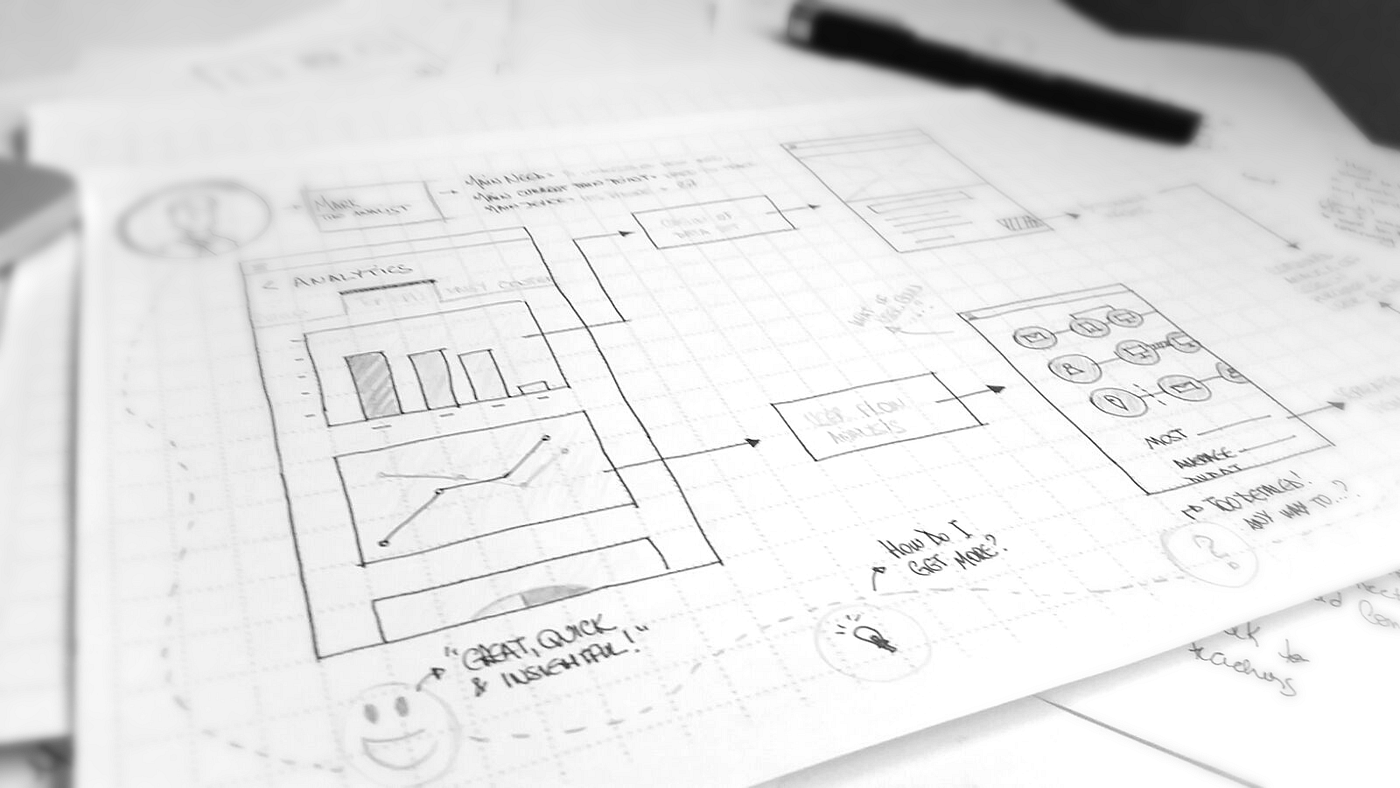
- Quick, cheap and can be easily changed. Ideal to quickly solidify ideas, to estimate effort on concepts and to test navigation. It also stimulates our creativity and helps to unblock ideas.
- However, low-fi prototypes like paper prototypes for example, still demands a lot of imagination from users and stakeholders. Needs explanation of context, and can be harder to ge the users to focus on the actual “feature” being tested. It can also end up being slower to build than other tools.
- Examples: Sketches, ‘Post-it’ notes, Storyboards, Wireframes (e.g. Balsamiq)
Evidence suggests that low-fidelity mock-ups are as effective in revealing design flaws as high-fidelity mock-ups, at least in this early stage (Virzi et al, 1996)
Middle and high-fidelity Prototyping
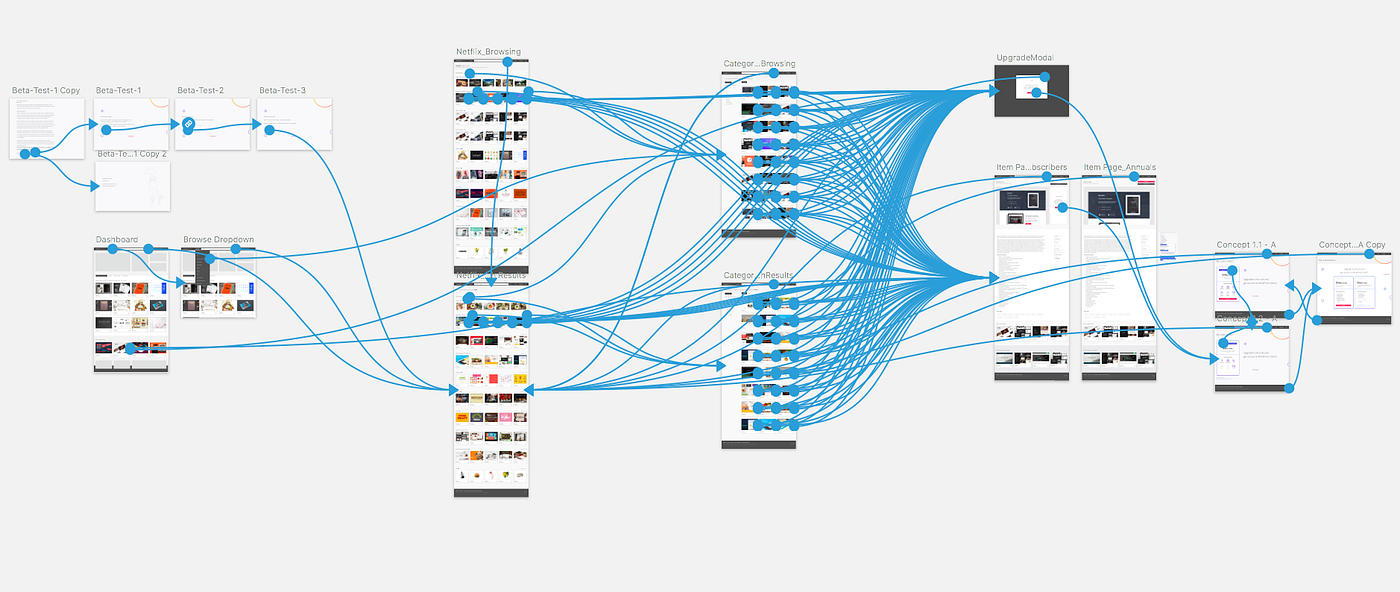
- Middle-fi prototypes are usually black and white to help set up expectations of how limited that prototype is. It’s ideal to show a high functional version of the concept, while still quick to design and cheap to discard.
- Hi-fi prototypes tend to use assets and to showcase interactions that will be part of the final product. Ideal to get feedback on visuals, estimate effort on interactions (like animations) and to help as guide for implementation. However, it’s tricky for users and stakeholders to understand limitations, as high-fidelity visuals tend to create expectation of full-functional products.
- Common softwares are: InVision, Sketch App, Axure, Figma.
How to choose the ideal tool?
Prototypr put together this amazing resource to compare prototyping tools based on different needs:
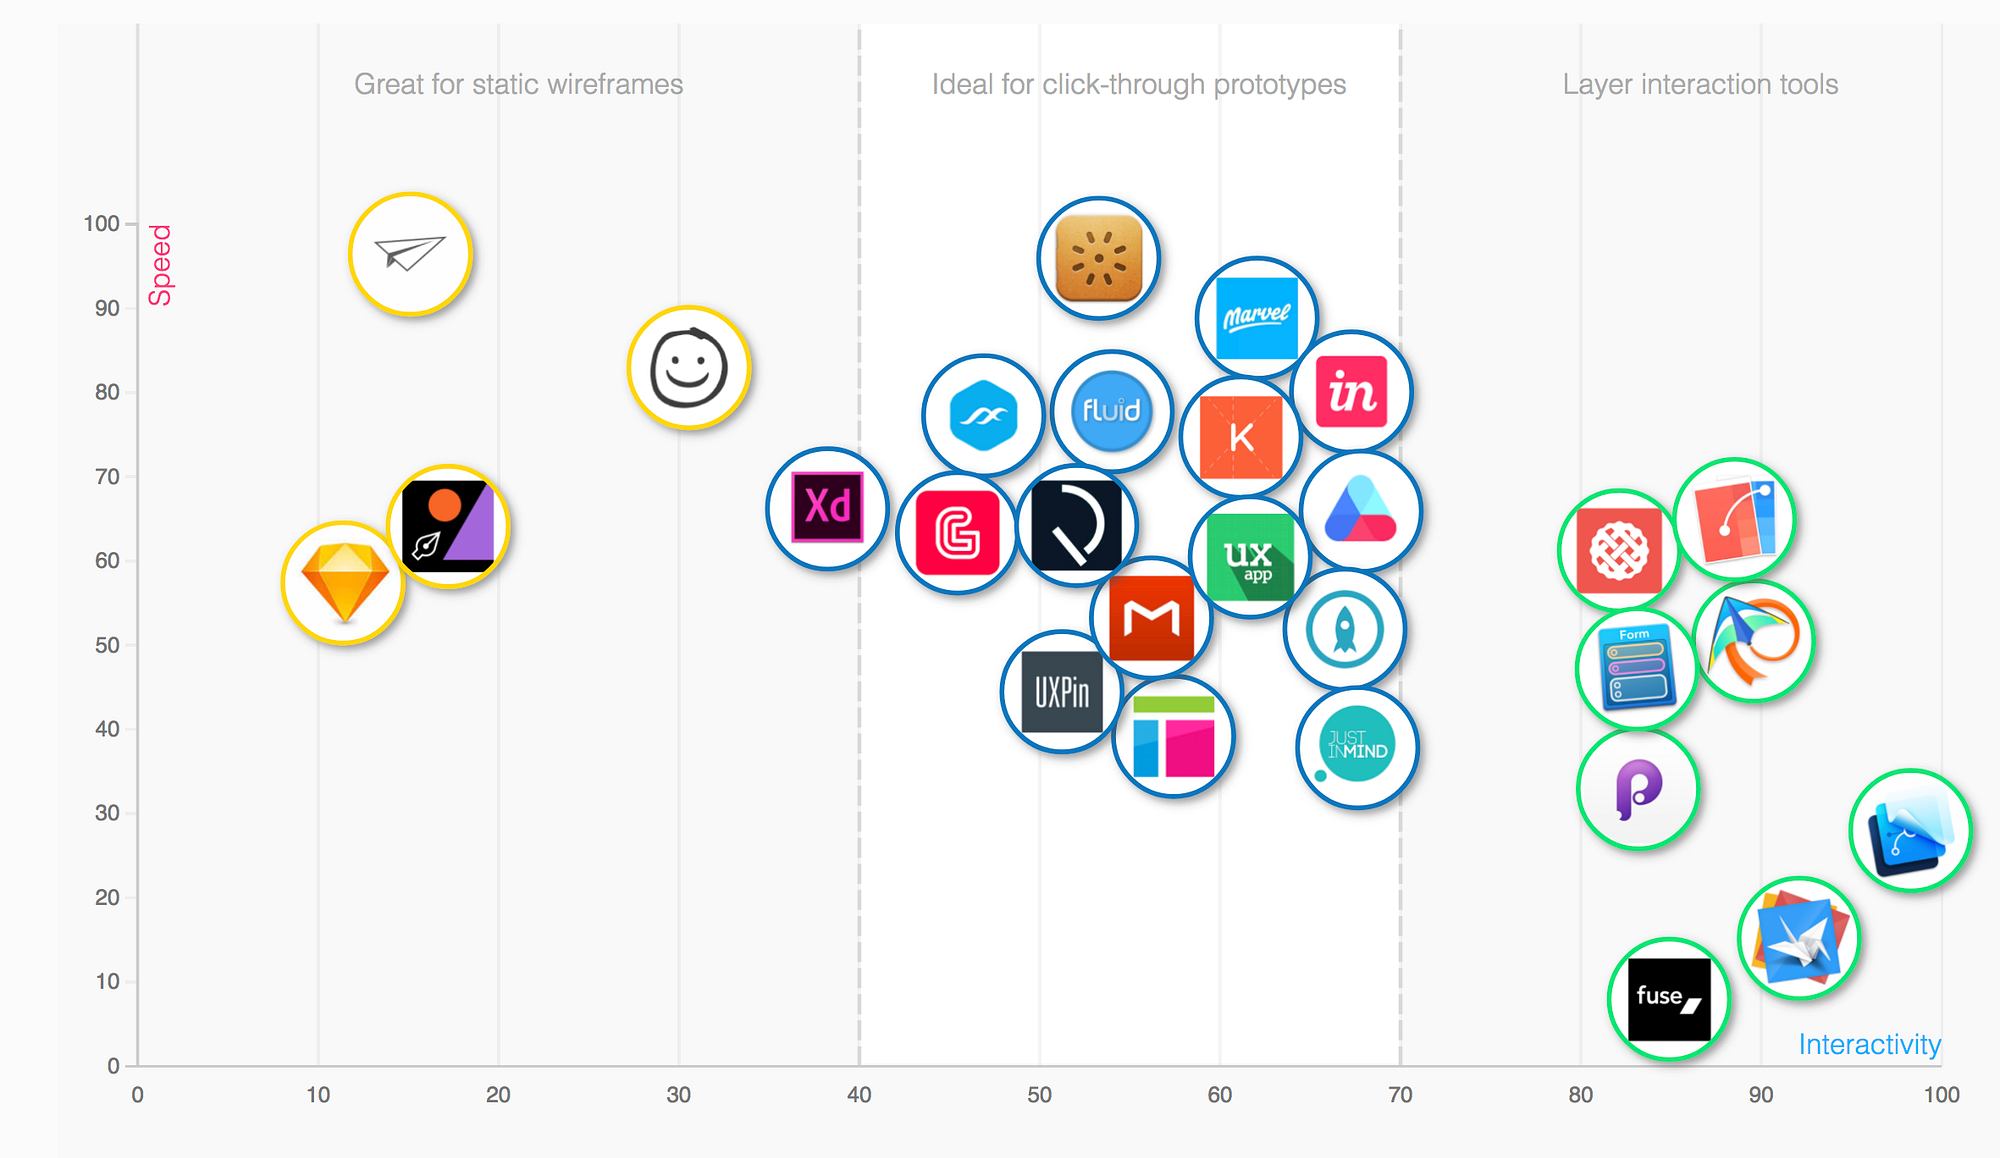
You can change the matrix based on different axis, such as level of Interactivity, Fidelity, or even how focused they are on User testing, Wireframing or Collaboration.
As if that wasn’t good enough — if you don’t have budget, you can even filter by tools that are “One time purchase” or free for ever. If you need to generate code, it got that option as a filter too. It’s just that easy to analyse and compare all the tools available in the industry!
However, if you need a more basic overview of some of the most used tools in the industry to understand their differences, here goes an easy guide for beginners:
You can clearly see how each tool enables us to achieve different outcomes: some more functional (like highly interactive, advanced animations, etc) and some of them are more visual (high-fidelity prototypes, but not necessarily highly interactive)
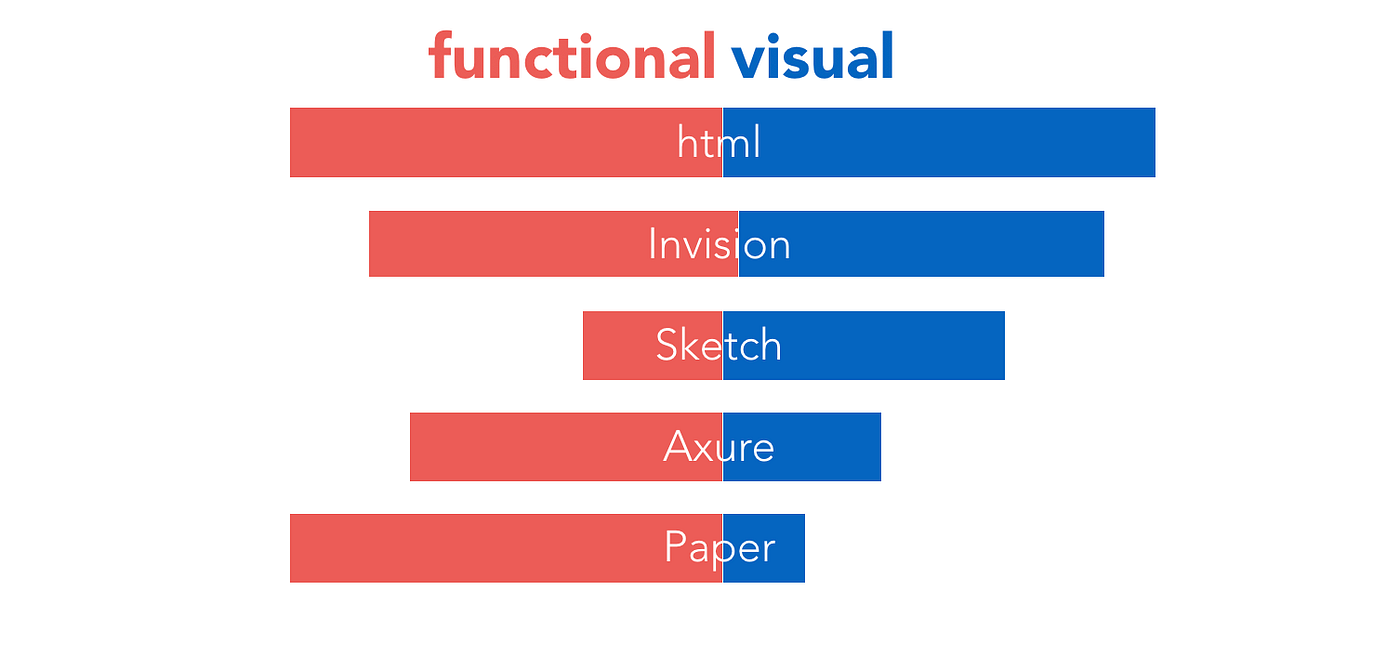
- HTML is a great option when you need high fidelity cross functionality and visuals. It’s great to sell your idea to a client, for example — but works better when we have time to invest in it (and requires some coding skills).
- Prototyping tools such as Invision are really handy for interactive prototypes that demand high fidelity screens and some sort of interaction, but are still built based on mockups.
- Sketch App is a handy software as it makes prototyping/wireframing really quick for both low-fi and hi-fi mockups. It has a bunch of plugins available that enable us to create clickable prototypes (such as Craft, that is integrated to Invision), but, on its own is not a very powerful tool to demonstrate interactions or animations.
- Axure is extremely powerful for interactions, but slower to build hifi designs. Ideal to get feedback on interactions as it creates an extra layer of interactivity that is only achievable with coded prototypes (like HTML) .
- Paper prototypes are really efficient to communicate ideas and functionality, but hard to communicate how branding and visuals will be applied.
My “secret weapon” is to combine multiple of them so I can take the best out of each. For example, If I need a highly-functional prototype, with high-fidelity visuals and I don’t have time to code, I will probably design my high-fidelity screens in Sketch (because it’s quick), important them to Axure and add interactions there (making forms interactive, for example). So it’s all about picking the tools we are more familiar with — , so we can achieve the best outcome in the shorter period of time possible!
So what is your favourite prototyping tool? Aaand why?
Share with us in the comments!


