Make a Camera Web App — Tutorial / Part: 1
Learn how to make a Camera app with HTML, CSS, and JavaScript
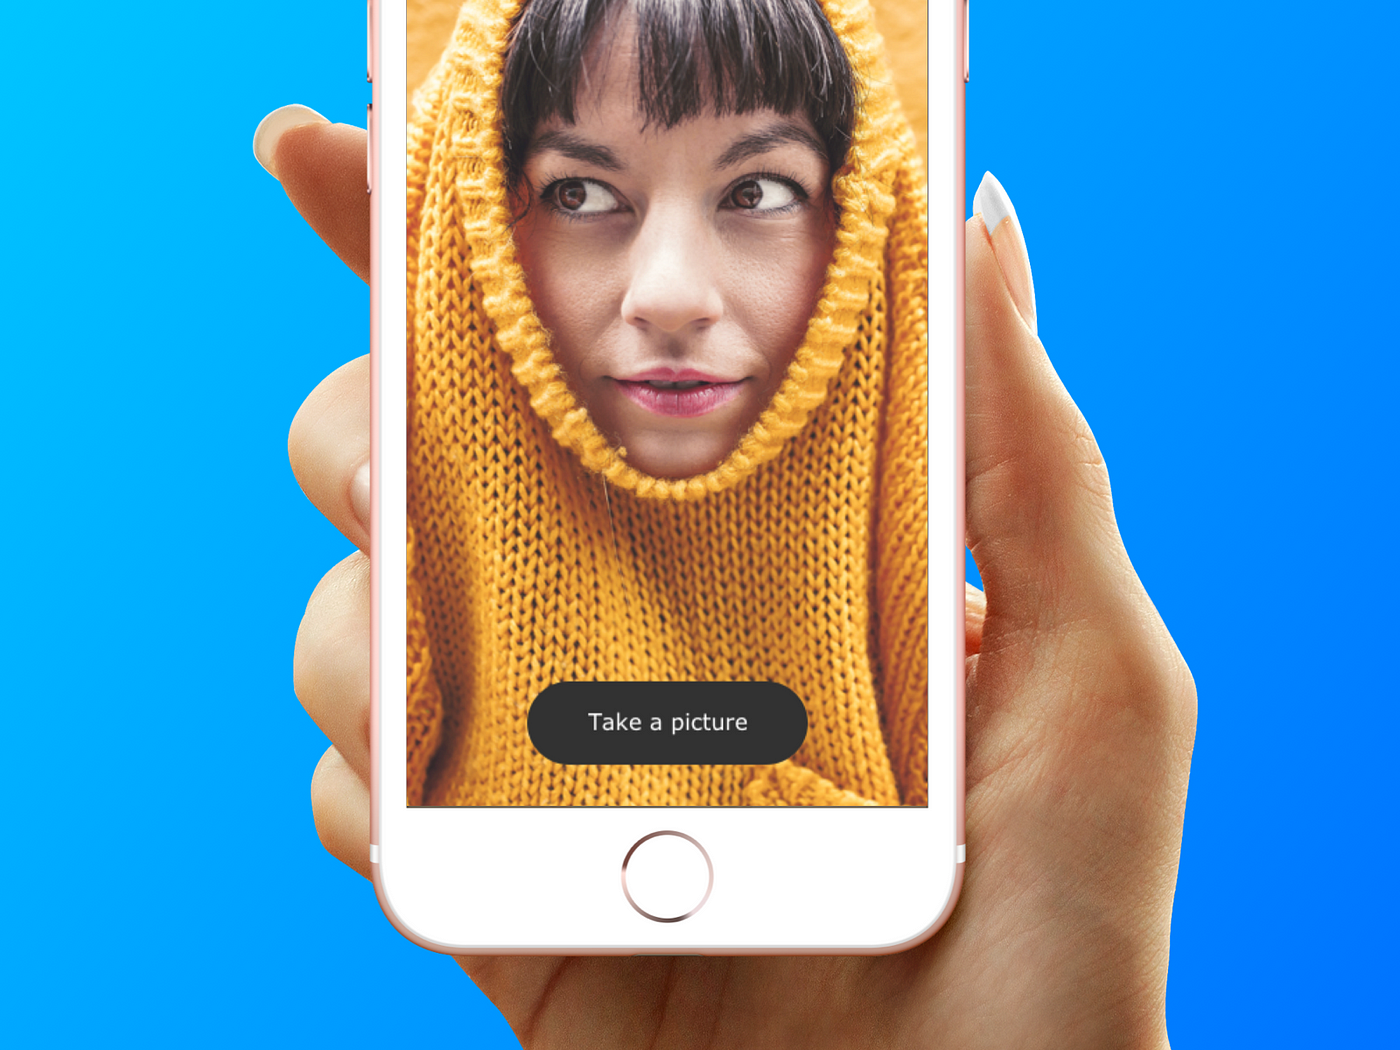
This tutorial will walk you through creating a camera app that runs in your phone’s browser. (Like magic)
In Part 1, we’ll cover:
- Setting up the project
- Creating a working camera app that can take a picture
- Testing your camera app on your phone
Some notes:
- As of right now, only the Safari browser supports camera access on iOS
- The camera can only be accessed from pages using TSL/HTTPS (More info below)
Let’s get started…
Setup
Create a new folder on your computer named camera-app.

Open that folder in your favorite text editor. I’m going to use Sublime Text 3.
Create 3 new documents and save them as index.html, style.css, and app.js.
HTML
Setup a basic HTML document using the following template:
<!doctype html><html lang=”en”><head>
<meta charset="utf-8">
<meta http-equiv="x-ua-compatible" content="ie=edge">
<meta name="viewport" content="width=device-width, initial-scale=1"><!-- Name of your awesome camera app -->
<title>Camera App</title> <!-- Link to your main style sheet-->
<link rel="stylesheet" href="style.css">
</head><body><!-- Reference to your JavaScript file -->
<script src="app.js"></script> </body></html>
Next, we’ll create the basic parts of the camera.
Inside the <body> tag, create a <main> element with an ID of camera.
<!-- Camera -->
<main id="camera">

</main>
Inside the <main id=”camera”>, create a <canvas> element with the ID of camera--sensor.
Similar to a real camera sensor, the canvas element will grab a frame from the video stream when we tell it to, and draw it to the next element we’ll create.
<!-- Camera -->
<main id="camera">    <!-- Camera sensor -->
    <canvas id="camera--sensor"></canvas></main>
Next, create a <video> element with the ID camera--view and add autoplay and playsinline.
The video element will access the device’s camera and display the video stream.
<!-- Camera -->
<main id="camera">    <!-- Camera view -->
    <video id="camera--view" autoplay playsinline></video>

    <!-- Camera sensor -->
    <canvas id="camera--sensor"></canvas></main>
Create an <img> element with the ID camera--output and the source set to //:0 (using //:0 as the source will prevent the empty image icon from showing without the browser showing a security warning).
The img element will display the picture after it’s taken.
<!-- Camera -->
<main id="camera">

    <!-- Camera sensor -->
    <canvas id="camera--sensor"></canvas>    <!-- Camera view -->
    <video id="camera--view" autoplay playsinline></video>    <!-- Camera output -->
    <img src="//:0" alt="" id="camera--output"></main>
The last piece we need is a button to snap a picture with.
Create a <button> element with an ID of camera--trigger and add Take a picture inside of it (or whatever you want to label your button) .
<!-- Camera -->
<main id="camera">    <!-- Camera sensor -->
    <canvas id="camera--sensor"></canvas>

    <!-- Camera view -->
    <video id="camera--view" autoplay playsinline></video>

    <!-- Camera output -->
    <img src="//:0" alt="" id="camera--output">    <!-- Camera trigger -->
    <button id="camera--trigger">Take a picture</button></main>
Your HTML document should look like this:
<html lang=”en”><head>
    <meta charset="utf-8">
    <meta http-equiv="x-ua-compatible" content="ie=edge">
    <meta name="viewport" content="width=device-width, initial-scale=1">    <!-- Name of your awesome camera app -->
    <title>Camera App</title>    <!-- Link to your main style sheet-->
    <link rel="stylesheet" href="style.css">
</head><body>    <!-- Camera -->
    <main id="camera">        <!-- Camera sensor -->
        <canvas id="camera--sensor"></canvas>        <!-- Camera view -->
        <video id="camera--view" autoplay playsinline></video>        <!-- Camera output -->
        <img src="//:0" alt="" id="camera--output">        <!-- Camera trigger -->
        <button id="camera--trigger">Take a picture</button>    </main>    <!-- Reference to your JavaScript file -->
    <script src="app.js"></script></body></html>
You did it! The HTML part is complete…on to CSS!
CSS
To make sure everything is laid out correctly and looks snazzy, we’ll add some styles to the page with the style.css file we created.
Inside your style.css file, add a selector for html, body and set the margin and padding to 0. This will make sure there’s no unplanned spacing in the viewport. Set the width and height to 100%.
html, body{
    margin: 0;
    padding: 0;
    height: 100%;
    width: 100%:
}
Next, we’ll need to fit the elements we created to the screen.
Add a selector for #camera, #camera--view, #camera--sensor, #camera--output and set the position property to fixed. Set the width and height to 100%. Set object-fit to cover so that the video takes up the whole screen.
#camera, #camera--view, #camera--sensor, #camera--output{
    position: fixed;
    height: 100%;
    width: 100%:
    object-fit: cover;
}
Since we’re shooting on a phone using the “selfie” camera, we’ll want to mirror the image to make it feel more natural.
#camera--view, #camera--sensor, #camera--output{
    transform: scaleX(-1);
    filter: FlipH;
}
Set the position property for #camera--trigger to fixed and add some other style (see below) to center it on the bottom of the screen.
#camera--trigger{
    width: 200px;
    background-color: black;
    color: white;
    font-size: 16px;
    border-radius: 30px;
    border: none;
    padding: 15px 20px;
    text-align: center;
    box-shadow: 0 5px 10px 0 rgba(0,0,0,0.2);
    position: fixed;
    bottom: 30px;
    left: calc(50% - 100px);
}
Last, we’ll add some styling for the image after it’s taken…
.taken{
    height: 100px!important;
    width: 100px!important;
    transition: all 0.5s ease-in;
    border: solid 3px white;
    box-shadow: 0 5px 10px 0 rgba(0,0,0,0.2);
    top: 20px;
    right: 20px;
    z-index: 2;
}
Your style.css file should look like this…
html, body{
  margin: 0;
  padding: 0;
  height: 100%;
  width: 100%;
}#camera, #camera--view, #camera--sensor, #camera--output{
    position: fixed;
    height: 100%;
    width: 100%;
    object-fit: cover;
}#camera--view, #camera--sensor, #camera--output{
    transform: scaleX(-1);
    filter: FlipH;
}#camera--trigger{
    width: 200px;
    background-color: black;
    color: white;
    font-size: 16px;
    border-radius: 30px;
    border: none;
    padding: 15px 20px;
    text-align: center;
    box-shadow: 0 5px 10px 0 rgba(0,0,0,0.2);
    position: fixed;
    bottom: 30px;
    left: calc(50% - 100px);
}.taken{
    height: 100px!important;
    width: 100px!important;
    transition: all 0.5s ease-in;
    border: solid 3px white;
    box-shadow: 0 5px 10px 0 rgba(0,0,0,0.2);
    top: 20px;
    right: 20px;
    z-index: 2;
}
All set with CSS. Let’s write some JavaScript…
JavaScript
The JavaScript file will pull everything together and make the magic happen. Open up your app.js file and lets get busy.
First, we need create a variable for our constraints (or settings) for the video stream. We want to default to the camera facing the user (You can set facingMode to "environment" if you’d rather default to the rear camera). We also want to tell the browser we don’t need audio from the device.
At the top of the app.js file, write…
var constraints = { video: { facingMode: "user" }, audio: false };Next, we need to define constants for all of the parts we created.
On the next line, write…
const cameraView = document.querySelector("#camera--view"),
      cameraOutput = document.querySelector("#camera--output"),
      cameraSensor = document.querySelector("#camera--sensor"),
      cameraTrigger = document.querySelector("#camera--trigger")
Now that we’ve gathered all the pieces we need, we need to create a function — we’ll call it cameraStart — that will access the camera and stream the video to the camera--view element we created.
This code uses the getUserMedia method to access the camera using the constraints we defined. We’ll make cameraView the source for the stream. We’ll also add a .catch to make sure an error is reported if the camera doesn’t work.
function cameraStart() {
    navigator.mediaDevices
        .getUserMedia(constraints)
        .then(function(stream) {
        track = stream.getTracks()[0];
        cameraView.srcObject = stream;
    })
    .catch(function(error) {
        console.error("Oops. Something is broken.", error);
    });
}
Once we have a video stream to work with, we can program the button to grab a frame from the stream that we’ll use as our image output.
cameraTrigger.onclick = function() {
    cameraSensor.width = cameraView.videoWidth;
    cameraSensor.height = cameraView.videoHeight;
    cameraSensor.getContext("2d").drawImage(cameraView, 0, 0);
    cameraOutput.src = cameraSensor.toDataURL("image/webp");
    cameraOutput.classList.add("taken");
};
Last, we’ll need to initiate the cameraStart function when the window is finished loading. That’ll look like this…
window.addEventListener("load", cameraStart, false);Altogether, your app.js file should look like this…
// Set constraints for the video stream
var constraints = { video: { facingMode: "user" }, audio: false };// Define constants
const cameraView = document.querySelector("#camera--view"),
    cameraOutput = document.querySelector("#camera--output"),
    cameraSensor = document.querySelector("#camera--sensor"),
    cameraTrigger = document.querySelector("#camera--trigger")// Access the device camera and stream to cameraView
function cameraStart() {
    navigator.mediaDevices
        .getUserMedia(constraints)
        .then(function(stream) {
        track = stream.getTracks()[0];
        cameraView.srcObject = stream;
    })
    .catch(function(error) {
        console.error("Oops. Something is broken.", error);
    });
}// Take a picture when cameraTrigger is tapped
cameraTrigger.onclick = function() {
    cameraSensor.width = cameraView.videoWidth;
    cameraSensor.height = cameraView.videoHeight;
    cameraSensor.getContext("2d").drawImage(cameraView, 0, 0);
    cameraOutput.src = cameraSensor.toDataURL("image/webp");
    cameraOutput.classList.add("taken");
};// Start the video stream when the window loads
window.addEventListener("load", cameraStart, false);
Hosting
Let’s test our app!
First, we need to host it on a secure HTTPS server. You can do this locally on your machine if you like…but that’s another tutorial.
We’re going to use GitHub pages.
- It’s free
- It’s pretty easy to use
- It offers HTTPS
The first thing you need to do (if you haven’t already) is create a GitHub account.
When you’re registered and signed in, find the green “New repository” button. and give it a click.

Give your repository a name. I’ll call mine camera-app. Make sure you check the box that says “Initialize this repository with a README”.

After you click “Create repository”, select “Upload files” from the tool bar.

Upload the files we created to your GitHub repository by selecting them and clicking “Commit changes”.
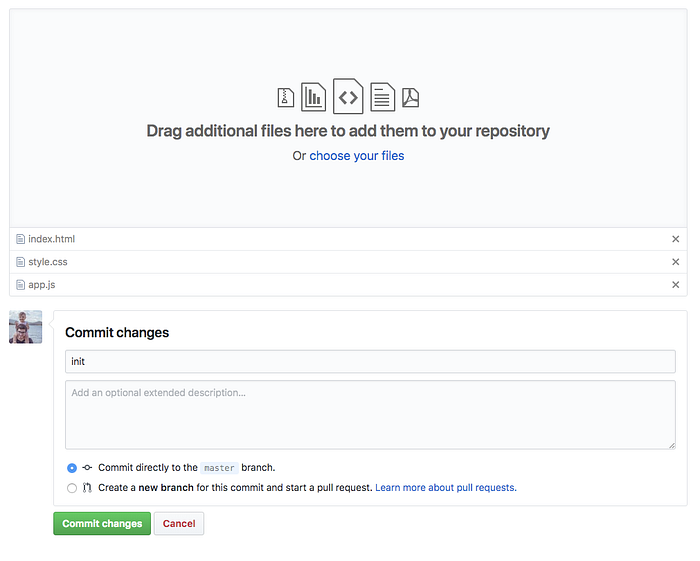
When the files are committed, you should see them in your repository.

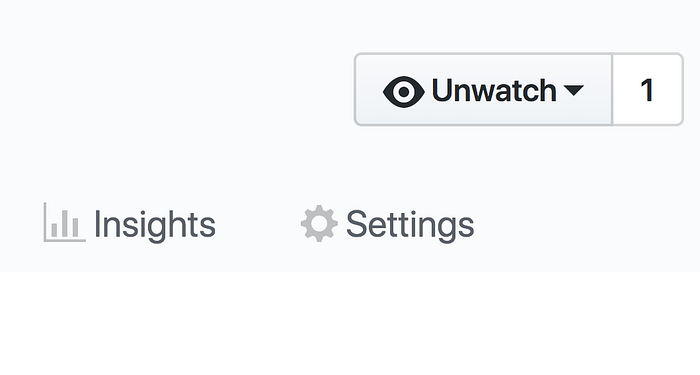
The next step is to setup GitHub pages.
Click the “Settings” tab at the top.
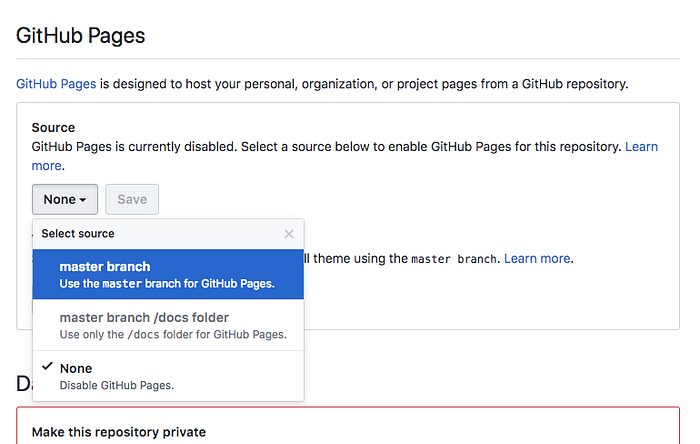
In the GitHub pages section, select master branch from the menu and click “Save”.
From your computer or mobile device, visit https://yourGitHubUsername.github.io/camera-app
You should be able to see your working camera app. Take a selfie!
You can find these files on GitHub at https://github.com/abenjamin765/camera-app
In Part 2, we’ll cover…
- Creating & using an App Icon
- Toggling the front and back cameras on a phone
- Saving a picture