Let’s Build a Robot: A Sketch Tutorial
Difficulty: beginner | Length: short
Let’s build a robot today! If you don’t have the Sketch software, you can get a free trial for thirty days. We will be using a variety of simple shapes to build our illustration and this tutorial is a great way to familiarize yourself with the application.
Quick Tip: All keyboard shortcuts in Sketch can be found here.
1. Set up a New Document and Artboard
When you open Sketch you are brought to a landing page to create a new document. You can also find other tutorials and features if you are interested.
Choose New Document.

Now you should have a blank canvas. You can create an artboard by pressing the A key on your keyboard or click Insert > Artboard and click and drag. In the right sidebar you can specify exact dimensions. Let’s make the artboard 800px x 800px.


Now is a good time to save your file!
2. Build the Body
We are going to build the robot body with a series of rounded and straight-edge rectangles. Starting with the head, press the U key (or Insert > Shape > Rounded Rectangle) and click and drag to create the shape. My dimensions are 390px x 275px, with a rounded edge of 38px. The color of the grayscale robot is easy — we will use the default fill (#D8D8D8) and border (#979797) colors for most of the illustration. We want the robot to be surrounded by thick lines to make him pop off of the page, so make the border a thickness of 8px. (The thickness setting is right next to the color.)
Here is what we get:

Now we want to fill in the rest of the body with a couple of other rectangles. (Remember, the keyboard shortcuts are Rounded Rectangle (U key), Regular Rectangle (R key), or go to Insert > Shape > … ) Here are my dimensions (image below):
Neck: 167px x 40px
Body: 316px x 168px, rounded corners 17px
Legs: 38px x 80px
All with a fill color of #D8D8D8 and border color #979797, thickness 8px.

Quick Tip: The trick is to line up the border of each shape so that they overlap. This is easier to do if you zoom in close! (Ctrl +)

Awesome! Let’s move on to his feet and antenna.
Start by making an 80px x 80px circle (O key, or Insert > Shape > Oval) with a fill of #D8D8D8 and border of #979797 and thickness of 8px. To make a perfect circle, hold down the shift key while you drag the shape on the artboard.
To make it a semi circle, make sure you have the shape selected, and go to the top menu Layer > Path > Scissors. Snip off the bottom two edges to make a semi circle. Press esc to exit the tool. Now double click on the shape to get the direct selection tool. This will automatically set up a vector tool that you can use to connect the broken path on the bottom. Now you have a semi circle!

Add this shape to the feet (a little off center) and on top of the head (centered). To make the rest of the antenna, create a 27px x 79px rectangle (R key) with the same fill and border, and a 64px x 27px rounded rectangle with a corner radius of 14px. Click Arrange > Send to Back if they are in front of the semi circle.

Select all of the shapes created up to this point and group them (Cmd + G). In the left sidebar, double click the group and rename the layer body.
3. Arms, Eyes, and Mouth, Oh My!
Let’s start with the eyes. Make a 79px x 79px circle and position it as the right eye. Press Cmd + D to make a copy directly on top of that. While holding Shift + Alt, shrink the circle to about 38px x 38px. This keyboard shortcut will keep the center of the circle focused so that it will be aligned with our original shape!
Now select both circles and press Cmd + D again. Drag the copied shape to the left. While dragging, hold the Shift key — this will keep it aligned to the original. When you are happy with the position, adjust the border thickness on the shapes to make the eyes look a little buggy, like they are calculating something crazy.
Right eye: outside (9px), inside (5px)
Left eye: outside (5px), inside (11px).

The mouth is going to be a rounded rectangle, 233px x 87px, thickness 9px, corner radius 26px. The ‘tongue’ is a 150px x 18px rectangle with fill color #979797. With the shape selected, click on Transform from the top menu (this is the same as double clicking the shape). Select both top corners (use the shift key), and set the corner radius to 31px. This will round out only the top corners.


Select all of the elements of the face we have created, group them, and rename the layer face. Let’s move to the arms!
The arms use the same technique as the tongue for rounding corners. Make a 38px x 154px rectangle, with a border thickness of 9px. Double click (or click Transform) and select the top left corner. Make the corner radius 37px.
To make the hands, make a circle (O key) that is 78px x 78px, with a thickness of 8px. With the same technique as before, make a semi circle (Layer > Path > Scissors). Make another circle that is 32px x 32px, also with a thickness of 8px. Align the center of the smaller circle with the bottom of the semi circle. Select both shapes and click Subtract from the top menu. The resulting shape will have a claw-like essence to it. Done with the hand!


Now add a series of straight, horizontal lines to the arm using the L key (or Insert > Shape > Line), with a border thickness of 7px.

Select all of the shapes that make up the arm and group them (Cmd + G). Name the layer left arm. Now duplicate the group (Cmd + D) > right click > transform > flip horizontal. You have made the right arm! Place accordingly and rename this layer right arm.
Let’s have a look at what we have completed at this point:

It’s looking good! Don’t forget to save..now let’s add details!
4. Add Details and Reflections
Let’s start with the buttons on the body. Make three small circles (O key) that are 15px x 15px, and three rounded rectangles (U key) that are 113px x 11px with a corner radius of 6px. Feel free to play around with the fill of the gray for each element. Mine are a variety of #ABABAB, #B9B9B9, #9B9B9B, and #B6B6B6.

If you want to align or distribute these elements evenly, these features are on the top of the right sidebar.

Now we move to the final step: the reflections. These are not very exact, so feel free to play around with the dimensions.
Start with the body. Select the shape and duplicate it (Cmd + D). Uncheck the border and change the fill to #BEBEBE so it is easier to see and maneuver. Make the shape smaller so that it fills about one third of the body on the right hand side. Go into direct selection mode (double click, or transform) and click somewhere on the left edge to add an anchor point. Select the point you just created and move it towards the center. Play around with the corner radius on the edges and the bezel handles to get a nice reflection that you like. At the end, mine looks like this:

To add reflections on the legs, make two 12px x 56px rectangles without a border and a fill of #BEBEBE.
For the feet, hands, and face, do the same actions as the body. Duplicate the shape, change the fill to #BEBEBE, no border, direct selection, add an anchor point on the left side, and pull it towards the center. (Take a look at the images for reference).

Use the same reflection for the antenna semicircle as you did for the right foot.
Quick Tip: Really focus on one side, because you can duplicate and transform the shapes for an easy symmetry hack! (Remember: Cmd + D, Transform > Flip Horizontal)
Select all of the features and reflections and group them, naming the layer features. Save your file!
Done!!
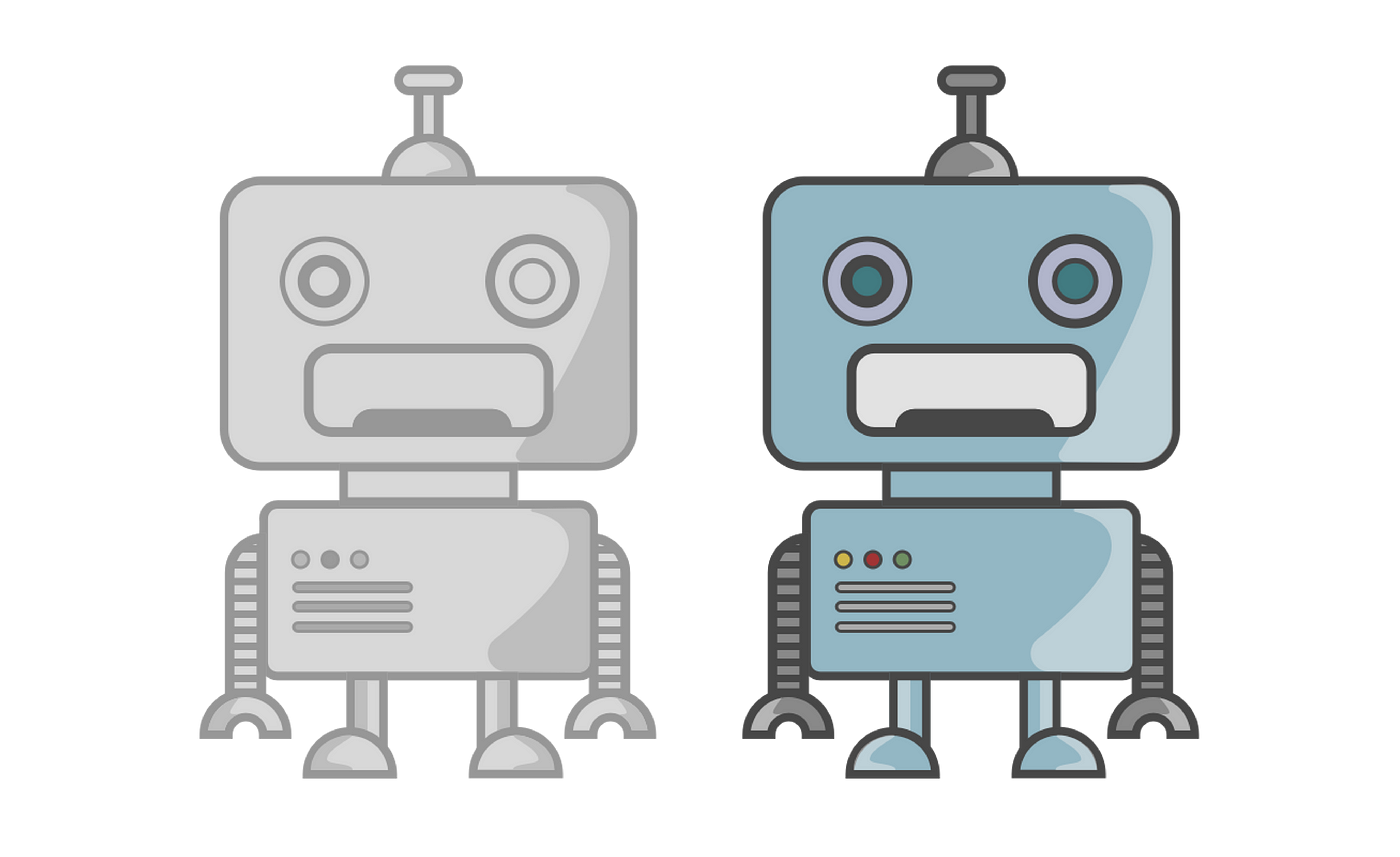
Woohoo!! Finished with the grayscale robot!!!

Get Creative!
Now you can start to add some color!!
Click on the Artboard text to select the entire artboard (or click it directly on the left sidebar menu), copy its contents (Cmd + C) and paste (Cmd + V). The new artboard should appear on the right.
Let’s see what you can come up with!!! Here are mine:

Congratulations!!
You have reached the end of the tutorial!!! I hope that you had some fun, and learned something new.
Did I not cover something well enough? Would you like to share your design? What did you think? I would love to hear from you! Comment below or give a 👏!