How to remotely control your Origami Studio prototype
…and get it working in under 1 hour

Why would anyone want to do this?
“Can I remotely control my prototype?” — a popular question on the Origami Community group. Sometimes when you’re demonstrating a new feature, or performing user testing, you might need to give your prototype a manual nudge of encouragement.
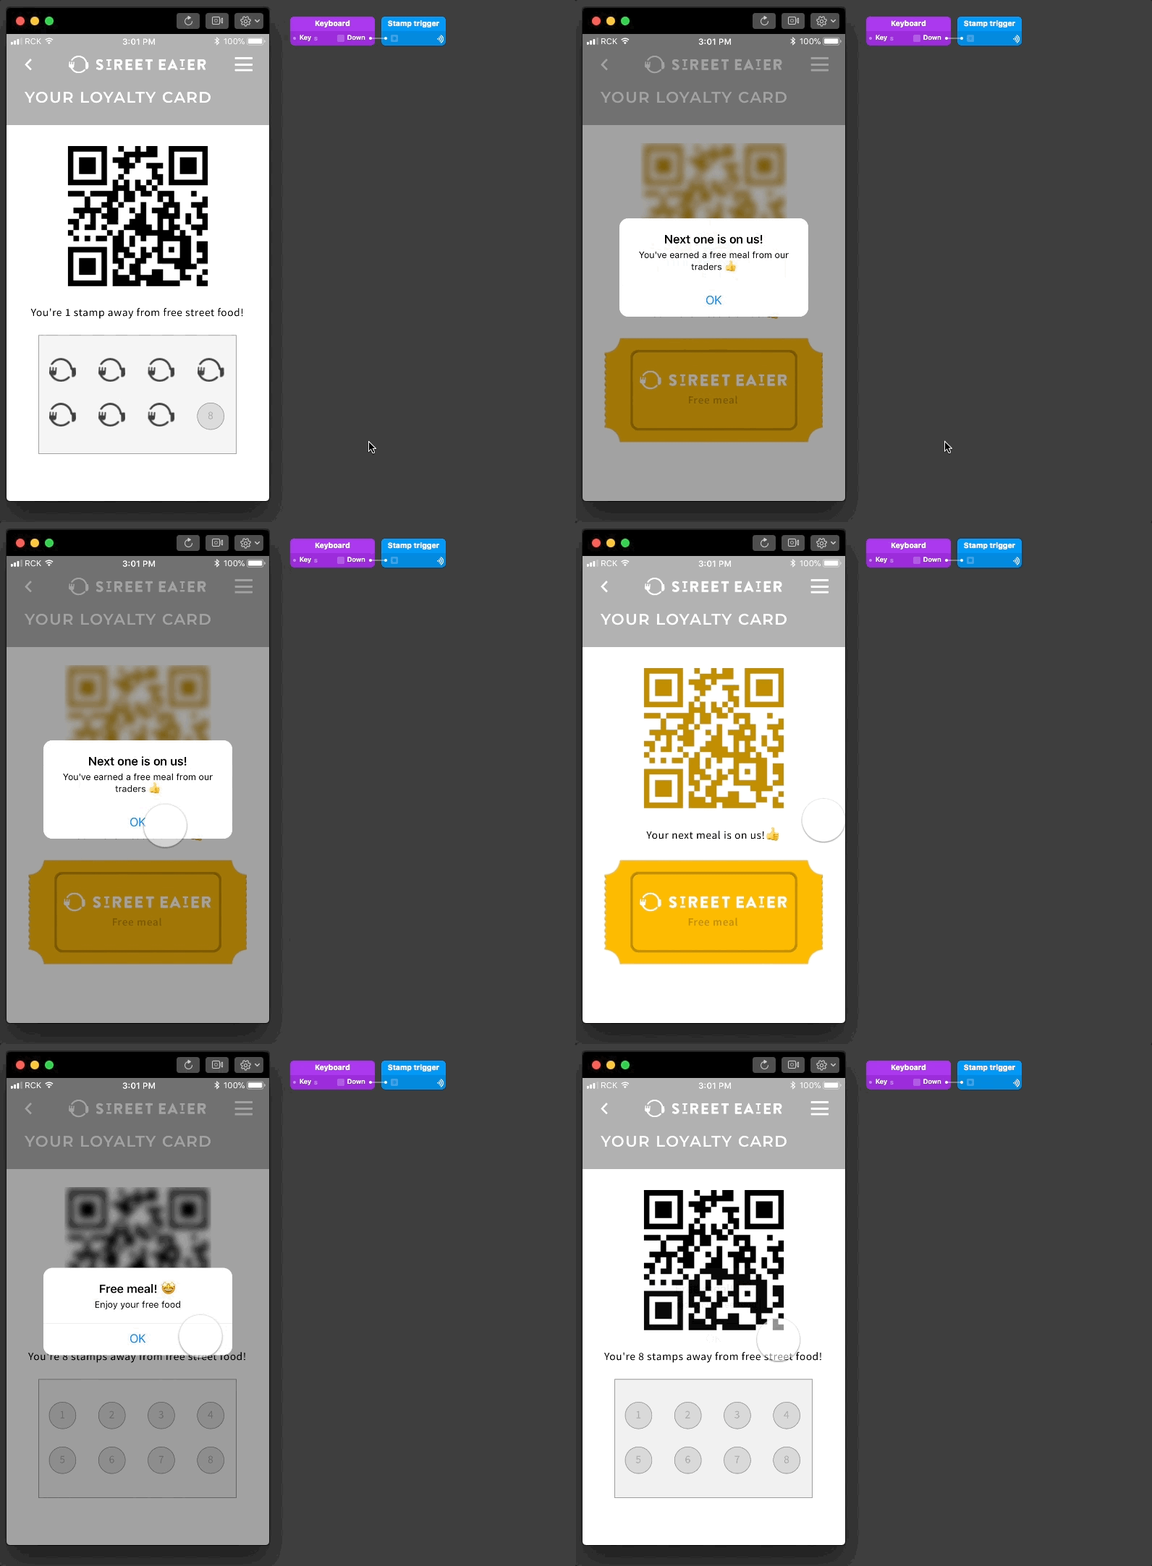
My situation is faking a QR code being scanned for a loyalty card feature on the Street Eater platform.

Fake it first
It’s worth pointing out that this tutorial is overkill for anyone who isn’t worried about ruining an illusion. For example, in all the internal reviews of this prototype I simply used a hidden Tap interaction to trigger QR scans.
But when it comes to user testing, it starts to gets a bit awkward if you have to jump in and say “Oh, sorry, the scanner — the whole feature you’re here to test — well it doesn’t actually work yet. Just tap the screen…it will work in the real one, promise.”
Part 1 — Remote control in a user testing lab

Testing in a lab is the most controlled situation you can wish for. If you’re lucky you will have a user testing room ready to go in your office. This means you can leave some dedicated equipment in the room to control your prototypes 🙂.
Origami supported hardware
Origami Studio has support for MFI game controllers and also listens for key presses on any connected keyboard. Both input options work with the Origami Live iOS and Android apps.
But which is best for your prototype?
Bluetooth Keyboard
+ Hardware you’re more likely to already own
+ Not too distracting during user testing
- Keyboard patch can’t be used whilst a text field component is being edited (i.e. the device’s keyboard is prioritised for text entry)
Fake keyboard (e.g. 1Keyboard)
+ Only need your laptop
- Not great if you need to use your laptop!
MFI Game Controller (e.g. Steel Stratus)
+ Input is independent from any other patches or components
+ Various types of input (discrete and continuous)
- Facilitator ‘playing’ with game controller could be very distracting for test users
- Extra hardware cost (unless you have really great office perks!)
Both are good options for in house testing. In the end I opted for an MFI controller, as it works straight away with all devices and all prototypes (more on keyboard issues later).
However, you might not be able to buy a game controller (or be patient enough to wait for it to arrive!). Below are the ways you can listen to keystrokes (spoiler —this will be important for Part 2, it’s not wasted effort even if you have an MFI controller).
Listening to keystrokes in Origami Studio
Origami Studio is pretty straightforward. Use the ‘keyboard’ patch to listen for a particular keystroke. Simple!

Listening to keystrokes with Origami Live (iOS / Android)
Unfortunately the above setup won’t work with the Origami Live mobile app. Mac OS is always sending keystrokes to Origami Studio’s previewer, whereas iOS and Android only sends keystrokes to Origami Live if a text field is activated.
Essentially, if the built in keyboard isn’t triggered — Origami isn’t listening. This means you need to be editing a text field in your prototype to receive keystrokes.
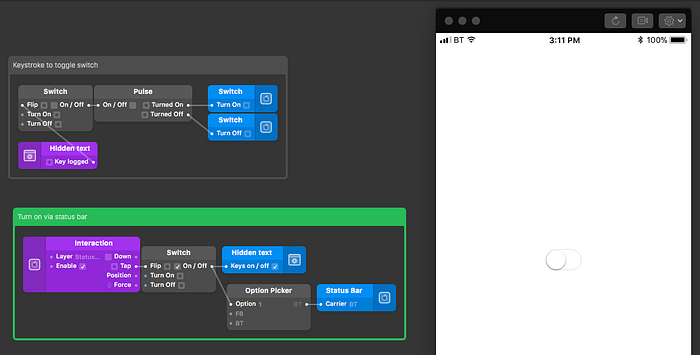
I made a very simple component that outputs a pulse when the length of a text field changes.

The component has two configurations, whether to listen to keystrokes and whether to display the text field. You can access the pulse output from the ‘Touch’ menu in the layer list. My quick example shows a key stroke turning a toggle on and off.

I strongly suggest putting a way in your prototype to turn this component on and off. If you do not have a remote keyboard attached to your mobile device, the built in keyboard will be displayed instead, over the top of your prototype.
I normally control this by tapping on the status bar and change the ‘carrier’ value in the status bar to ‘BT’ to remind me that I’m in bluetooth keyboard mode!

OK! So you’re all ready to control your prototype with a bluetooth keyboard, assuming your prototype doesn’t have any text fields in it…🤦♂
£30–50 to add an MFI controller to your test setup doesn’t sound too bad now, right…?
Part 2 — Testing on location
Not all user testing and demoing happens in a lab. Part 2 provides a solution for those scenarios when:
- You’re away from your own office / user testing lab
- Your success / results will be impaired by ruining the illusion of your prototype (i.e. the QR scanner not actually working)
This could be user testing, demoing an important new feature to your boss, or even a new business pitch.
In the case of the Street Eater loyalty scanner, I will be user testing with busy traders at one of Bristol’s main street food markets…at lunch time.

A testing environment
Traders are very busy and consumers want to move along quickly after queing for food. In the short amount of time I get with willing testers, I will be passing test devices to both consumer and trader, observing and recording them and will also have to trigger (at precisely the right moment) the fake QR scan (on both trader and consumer devices).

It wouldn’t be feasible to carry around big bluetooth device (and to be honest, it would look and feel a bit weird).
A new solution
Here’s my wish-list for a suitable solution:
- Send game controller signals (key presses too easily interfered with by text fields)
- Small enough to carry one (ideally two) in my hand at the same time as one (or maybe two) phone(s)
- Cheap enough to have two under £50
- Bluetooth & battery powered
- Ideally more than one output signal
Sadly a few things won’t be possible:
- To send game controller signals, my device would need to be registered and certified under Apple’s MFI program 💸. I will need to use keystrokes instead.
- Bluetooth devices can only send signals to one device at a time.
Buttons to choose from
I already have a set of Flic buttons which have been great for IoT experiements when paired up with a Raspberry Pi. Unfortunately to intercept their signals the Origami Live apps will need to support the Flic SDK.
Facebook said no, but did point me in the direction of Puck.js. The Puck doesn’t require an intermediary hub device or app (like the Flic button). There is even a tutorial for setting it up as a keyboard!
Preparing Puck.js
£60 (inc delivery) and 3 days later, two buttons arrived. The setup instructions are pretty straight forward, you will need to use Chrome to connect to the buttons via Web Bluetooth Low Energy (Web BLE).
You can run pretty much any JavaScript you want on these buttons, but if you want to get started I’ve written some code that emits a keystroke and has some helpful LED flashes too.
var kb = require("ble_hid_keyboard");NRF.setServices(undefined, { hid : kb.report });var battery = Puck.getBatteryPercentage();
function btnPressed() {// send "a" key presskb.tap(kb.KEY.A, 0);// flash green success leddigitalWrite(LED2,1);setTimeout(function(){digitalWrite(LED2,0);}, 200);// flash red led for 5 seconds if battery lowif (battery<10) {(function flashLight (i) {setTimeout(function () {digitalWrite(LED1,1);}, 500);setTimeout(function () {digitalWrite(LED1,0);if (--i) flashLight(i);}, 1000);})(5);}}// trigger btnPressed whenever the button is pressedsetWatch(btnPressed, BTN, {edge:"rising",repeat:true,debounce:50});
I have two buttons, one emitting A and the other B (not that this affects the keystroke listening patch at the moment). To identify them, one flashes green and the other blue (and I wrote with a sharpie on the back of them!).
The low battery LED warning will hopefully save you from turning up to a presentation with a flat battery.
All done! ✅
Connect the Puck.js to your mobile device, activate your hidden text field component and you’re ready to discretely control your prototype!
Next steps 📋
- Find a way to chain Puck.js buttons so one button press can send keystrokes to multiple devices (for now, though, pressing two of these tiny buttons is absolutely fine — much better than carrying round two keyboards!)
- Change action in Origami based on the keystroke received (e.g. so different buttons could trigger different events).
- Send a sequence of keystrokes to Origami to replicate strings of text or numbers (for example Puck buttons have many sensors, this data could be sent to Origami — but would need to be converted to keystrokes first!)
Files 🗂
As always, you can have a look at the Origami files via this Dropbox folder.

