Tutorial on how to prototype Instagram type mode with ProtoPie
Build an on-device prototype — no coding required!

Instagram recently launched Type mode in Stories, allowing users to share Story posts containing text on colorful backgrounds, without the inclusion of pictures or videos. Here is my attempt at recreating it using ProtoPie.
Getting Started — Download the design template
To save you some time, I’ve put together a Figma file with UI design resources for this tutorial.
Setting up the triggers ⚡️
Open ProtoPie on your desktop and create a new project. Click on Import and select Figma from the menu. Then select the first artboard and click import.

1. Switching between different themes 🎨
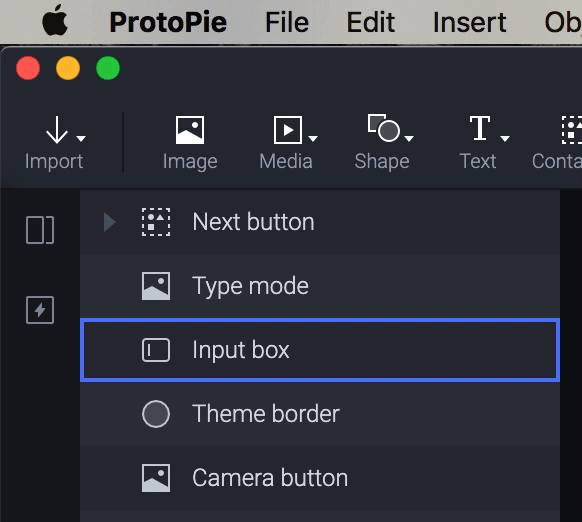
In the layers panel, we have two groups named Theme toggle and Theme. The Theme toggle group shows a preview of the next theme. And the Theme group shows the currently selected theme.
- Create a new variable in the Variables panel and rename it to currentTheme. This variable will help keep track of which theme is selected.
- In the interaction panel, add a Tap trigger on the Theme Toggle group. When the user taps on it, the response would be to transition from theme 1 to 2.
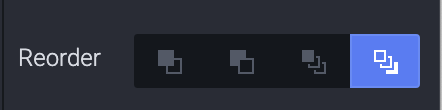
ProtoPie provides a super-easy way of doing this using the Reorder response.

We’ll apply the reorder response to the groups to simulate the theme selection.
- In the interaction panel, add a Condition response to check the value of currentTheme variable, based on the value we’ll reorder the layers accordingly.
- Inside the condition response, add a Reorder response on the Theme toggle group and Theme group.
- In the interaction properties panel select the option that puts the current layer to the back of the stack.
- Add an Assign response and set its value to the next theme number (in this case 2)

Repeat the same steps for the remaining 4 layers and run your Pie to see the result as shown below

2. Starting the camera 📸
Now that we have our themes setup. We need to apply it in real-time to the camera viewfinder
- In the toolbar menu click Media and select the Camera object.
Next,
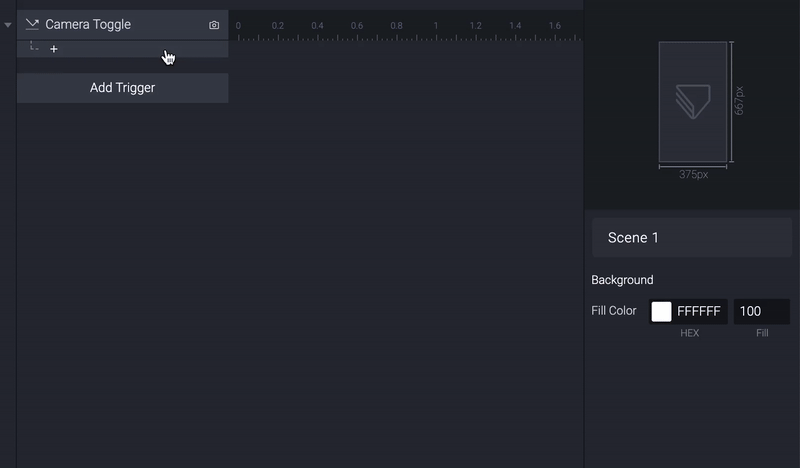
- Select the camera icon from the layers panel and add a new Tap trigger and rename it Camera toggle
- Inside the Camera toggle trigger, add a camera response and set the Action to Start the camera.
- To apply the theme to the viewfinder, add an Opacity response on the Theme group and set it to 50%.
Preview your Pie and you should see the camera mode active when you tap on the camera icon 👏
Next,
- Create a new variable in the Variables panel and rename it cameraActive, This variable will help keep track of whether the camera is on or off.
- After starting the camera, Assign the value of the cameraActive variable to 1 (ie: On).
- Add a Condition response to toggle the camera on or off depending on the cameraActive variable value.

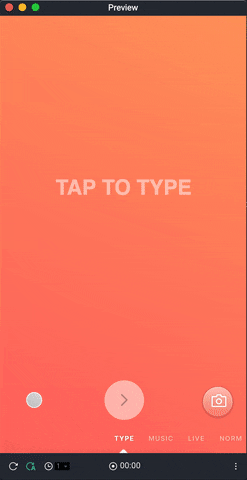
3. Type text using the keyboard 📱
At this point, everything is working as expected, but there is one more thing left, prototyping the type interaction.
- In the toolbar menu click on Text and select Input
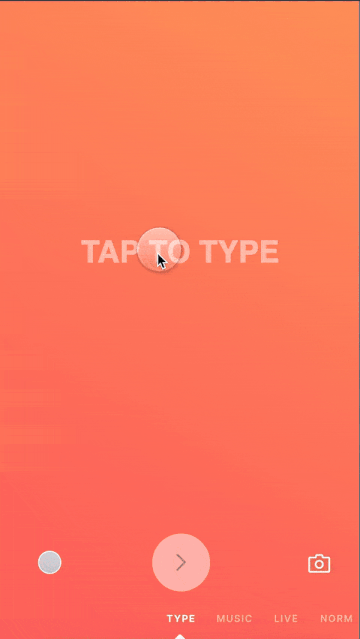
- Position the input box to be in the center of the screen. Enable placeholder text and change it to “Tap to type”.
Done!
Great job! Your Instagram type mode prototype is now ready to be shared and tested. Easy as pie, isn’t it? 😎

Learn the fundamentals of ProtoPie as well as how to solve real-world problems through prototyping. Subscribe for updates and I’ll send you an email every other week with tutorials and tips to bring your designs to life by turning them into advanced prototypes without any code!