Oppose to Adobe Illustrator, an angular gradient is a default feature of Gravit Designer. In this tutorial I want share with you some tips on how to work with the angular gradient, how to achieve a smooth transition and build an abstract colorful logo like those in the picture below.

Let’s start!
Step 01. New Document
Lunch your Gravit Designer and select the “Website — Large(1440x900px)” from the Web Sizing Dropdown on the Gravit’s Start Screen. It will create a 1440x900px canvas to work on.

Step 02. Create a Circle
Create a perfect 360px circle using the Ellipse Tool. Press and hold Shift key to constrain the proportions between with and height. You can use the Transform Panel on the top left of the Document to set a particular size (see the image below).

Step 03. Create a Pie
Head Over to the Shape values on the Appearance Panel and place a cursor in the first field. Change the value from 180 to 120 degrees to create a pie.

Create a duplicate with a Clone command or simply press a Ctrl/Cmd+Shift+D shortcut. Rotate the duplicate and place it as shown in the picture below.

Step 04. Angular Gradient
Bottom Object
Select the pie on bottom and head over to the Fill dialog box and select the Angular Gradient form the Fill Types on top.

You can add as many Gradient Spots as you wish by clicking on the object’s outline. Notice the plus sign that appeared near the cursor when you come over the outline.

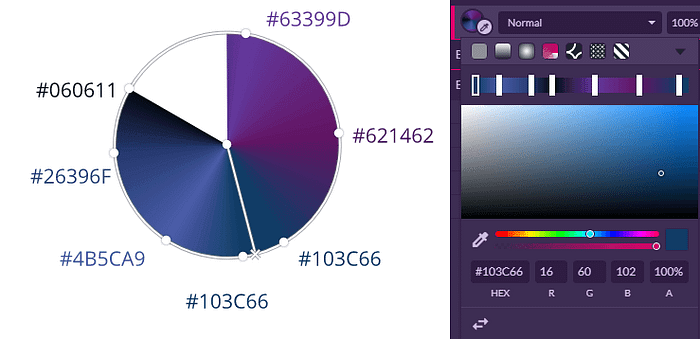
I am working with the seven colors listed below:
#060611#26396F#4B5CA9#103C66#103C66#621462#63399D
Apply them as the colors for the Gradient Stops of the bottom pie as shown in the picture below.
Once you are done with the colors, you can rotate the gradient holding the Gradient Line with the Selection Tool.
Therefore, the main advantage of the Gravit’s angular gradient is that you can control almost every aspect of it right on the object.
Top Object
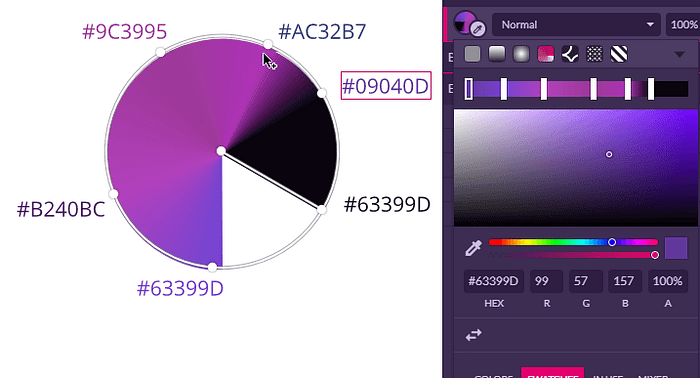
Select the top pie and apply the Angular Gradient with these colors:
#B240BC#7544D1#63399D#09040D#AC32B7#9C3995
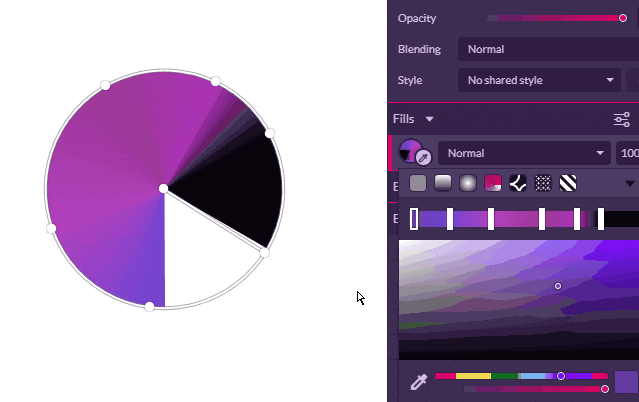
Step 05. Shape Adjustments
Last step in our tutorial is to change shape of the top pie. In order to do this we need to make duplicate of the both pies using Ctrl/Cmd+Shift+D.

Keep the duplicates selected and apply the Intersect Boolean Shape Operator.
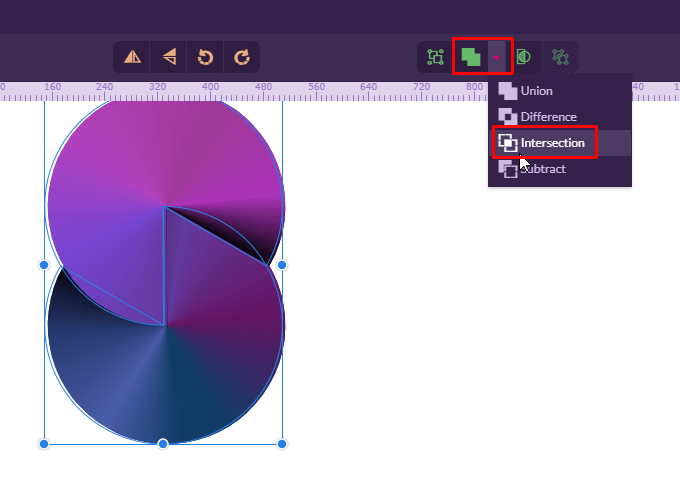
Convert this Compound Shape in the Compound Path in order to obtain the full control over the nodes.
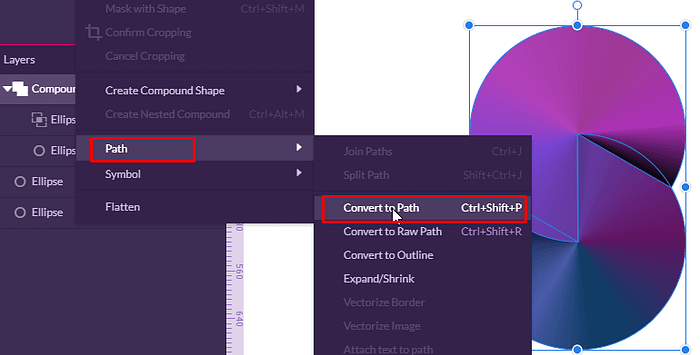
The end result is the path comprised of two semicircles.
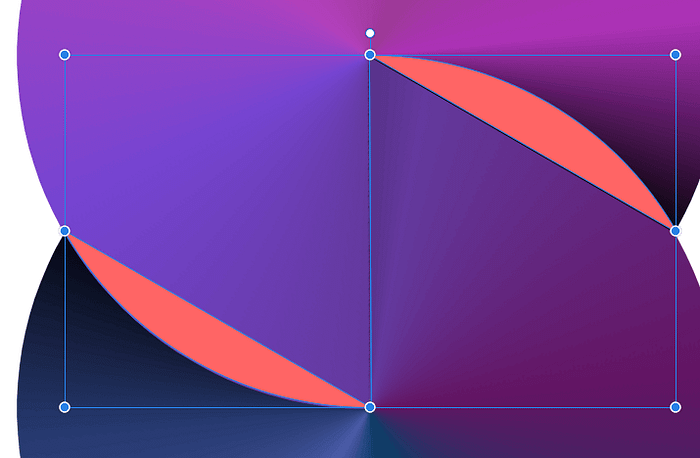
Grab the Subselect Tool and delete everything except the top semicircle by deleting the nodes one by one (select the node and press delete key).

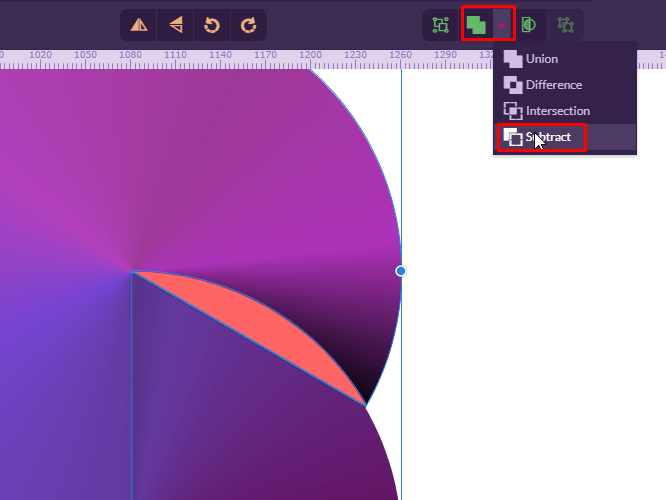
Select the top pie and this semicircle and apply the Subtract shape operator. You might need to rotate the angular gradient of this object.
Step 06. Come up with More Colors
Let’s add an icing on the cake and change all of the colors at once. We can do this by using Color Adjust Effect. Head over to the Effects/Color Adjust and play with the sliders.

Thanks for reaching to the end of this one. It’s a rather short vitorial with the aim to show you the features of the default Angular Gradient in Gravit Designer. I hope you’ve enjoy this article. Feel free to share it with your friends and give some likes to my videos and written tutorials or clap if you read it on Medium. Have a great day!

