Beginners guide to animating interactions, by a beginner.
So recently, I’ve been working more in including interactions in my projects. But as everything new, this poses a challenge and can be quite intimidating 😰 at first if you ask me.
That’s why I decided to share my “framework”, to kickstart yourself. I’m using Invision Studio for this, since is free and to my experimentation the easiest.
So let’s start. I believe the best way to start is by doing something very simple, like in the example provided, so don’t overcomplicate yourself. Remember first we walk then we run.
Picture your interaction 🌠
This might seem pretty obvious, but believe me, it helped me a lot. Get a piece of paper and sketch the initial state and final state of your component.
For this example, we are going to focus, on a select state of a component.

Very simple, we only add a visual queue of selection, change border and text color.
What changes between states? 🤔
The next step I always do is, trying to identify what elements are added to the final state, that didn’t exist in the initial state. This helps me to make animations smoother (or at least they look smooth to me 😂) since the animation, at last, is only a timeline, that dictates how elements of a component change over time. So if an element exists in the final state it has to start somewhere.
So let’s do this with our example.

We can see that Title and BG & Border both are in the initial and final state, but we are missing the checkmark in the initial state. So we’ll need to consider that when animating. This is important because a mistake I found myself doing constantly was not including these missing elements in the initial state, so the animation looked janky.
Translating to Artboards in Invision Studio ✍️
Alright, so I start by creating the initial state Artboard, making sure the naming is right (be sure to get this right, layer names are how Studio links elements) and only then I duplicate the Artboard and change the things of the next state.
In our case here are the artboards:


Getting back at the previous remark I did, let’s animate it without including the checkmark in the initial state, to see how it goes:

As you can see the checkmark, popups from nowhere. This is because it doesn’t exist in the previous state so it appears out of nowhere in the final state. The solution for this is pretty simple, simply add the checkmark in the initial state, and give it starting values:
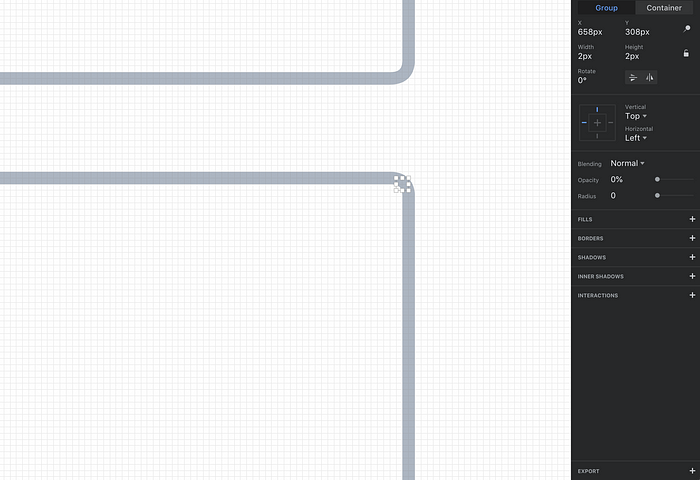
In my case, the final state of the checkmark is 24 x 24 px and 100% opacity so in order to make it “grow” my initial values can be set to 2 x 2 px and 0% opacity. With this change lets animate it again and see how it changed:

See, much smoother.
Conclusion 📝
So this is what did the trick for me: think timeline, and how the elements progress along that timeline. In simpler words add all elements of the final state in the initial state, and provide them with starting values. So all elements animated exist in the previous state and then progress to the end, kind of how CSS animations work:

Finally, here is the final interaction, I tweaked a little bit the times of each specific element, and added a hover state to complete the loop of this element interaction.

That’s it friends, hopefully you find this little tutorial helpful. Do you have any other tips for animating interactions? Share them with us in the comment section 😀

